


Cotton Flower Craft: A Quick Easy & Fragrant DIY Rose

Okay, confession time—I am obsessed with keeping my home smelling fresh, but let’s be real, fancy room sprays and candles can add up! So, what’s the next best thing? DIY perfumed cotton flower.
Made from cotton pads, these adorable roses are affordable, easy to make, and you get to pick your favorite scent. You’ll also have a cute little decorative rose that you can pop anywhere.

Tools and Materials
- Fluted glass
- Hot glue gun
- Cotton wool pads
- Your favorite perfume, linen spray, or essential oils
Hometalk may receive a small affiliate commission from purchases made via Amazon links in this article but at no cost to you.

1. Fold Your First Cotton Flower "Petal"
To start, take your cotton wool pad and fold it over the rim of the flute glass so that half of the pad sits inside the glass and the other half is on the outside. This forms the first "petal" of your rose.

2. Secure with Hot Glue
Now, grab your hot glue gun. Dab a small amount of glue on the corner of the cotton pad you just folded. This will secure the next petal in place.

3. Add the Next Petal
Take a second cotton pad and repeat the process. Fold it over the glass, slightly overlapping with the first petal. Use a dab of hot glue to secure it in place.

4. Complete the First Layer
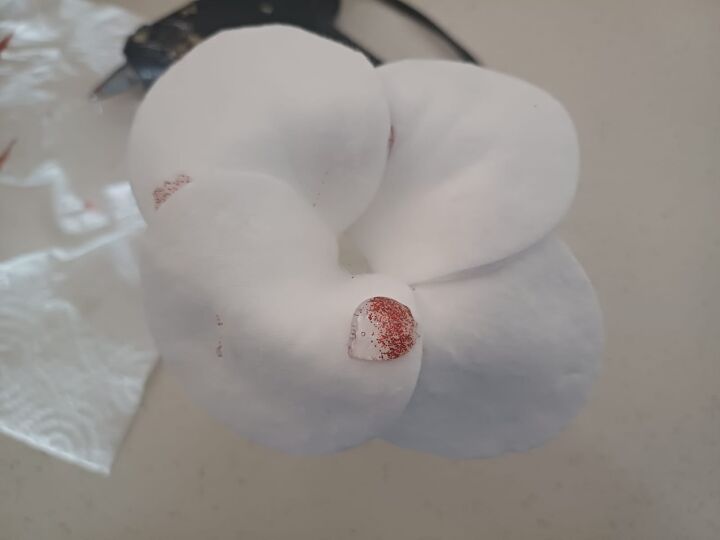
Continue adding and gluing cotton pads around the rim of the glass until you’ve created a full circle of petals.
Each pad should overlap the previous one slightly to give the rose a full, layered look.
5. Start the Second Layer
Once your first layer is complete, it’s time to add more depth to your rose.
Begin your second layer by gluing two dabs of hot glue onto the first layer of petals.
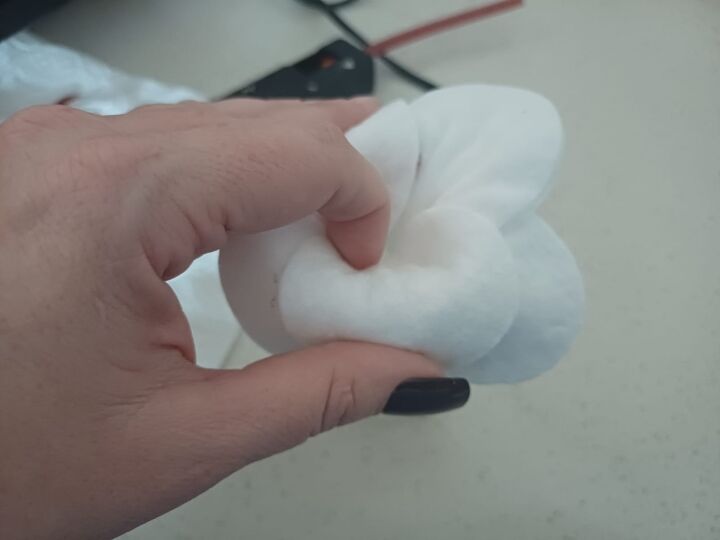
Attach the second layer of cotton pads, but this time, place each pad off-center from the petal beneath it.
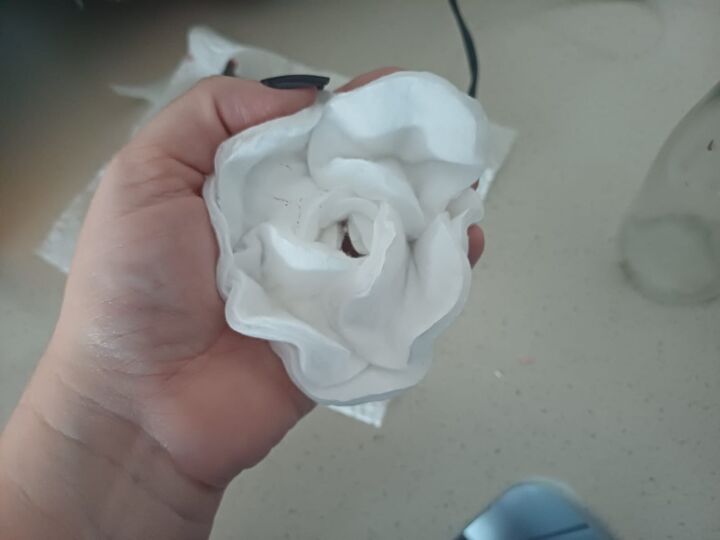
6. Finish and Remove the Rose
After completing the second layer, gently flip the flute glass over and remove your cotton rose. Now, your fragrant flower is ready for its final touch!

7. Display and Perfume Your Rose
Now that your cotton flower rose is complete, it’s time to add the perfect finishing touches!
You have two display options:
- Simple and Sweet: Spritz your rose generously with your favorite perfume, room spray, or a few drops of essential oil. Then, place it as-is on a shelf, table, or even inside a drawer for a subtle touch of fragrance.
- Stylish and Decorative: Get creative with your display! I used the same flute glass from earlier, added a green stick to mimic a stem, and set the rose over the opening of the vase. This gives it a natural and elegant look.
No matter how you choose to display them, these roses can last for weeks. Just remember to refresh the scent every couple of days to keep your space smelling lovely.
Bonus Tip
Why stop at just one? Make a bunch of these roses to keep on hand, ready to swap out when the scent fades. They’re perfect for freshening up your closet, dresser drawers, or even as a sweet-smelling decoration for your entryway.
Need Another Fun DIY Fragrance Idea?

How to DIY Cotton Flower Roses That Double as Air Fresheners
I’m officially hooked on making these little perfume roses, and I hope you are too! They’re such a quick and affordable way to keep your home smelling like a dream. Plus, you can totally customize the scent to match your mood.
Give it a go and tell me how it went, or better yet, share your creations and favorite fragrance in the comments below!


Frequently asked questions
Have a question about this project?