


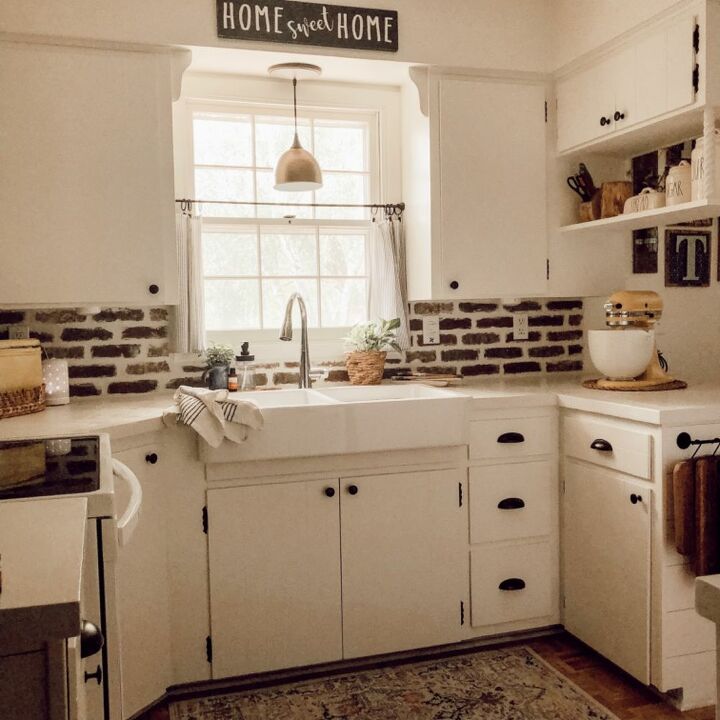
DIY Breakfast Bar Cabinet

Hi friends! When we first moved into our home, we found a matching cabinet door with the same hinges as our kitchen hanging out in the basement. I’m not sure what it was originally meant for, but I’m so glad we found a great use for it!
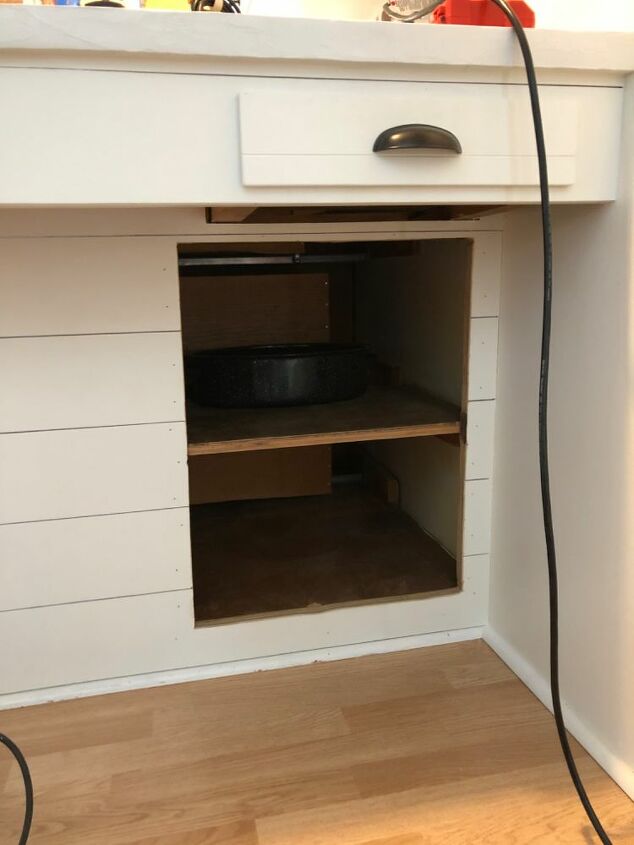
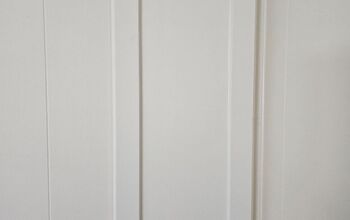
As you can see in this photo, I have access to the first half of the shelves in my breakfast bar from the front.
Hometalk Recommends!
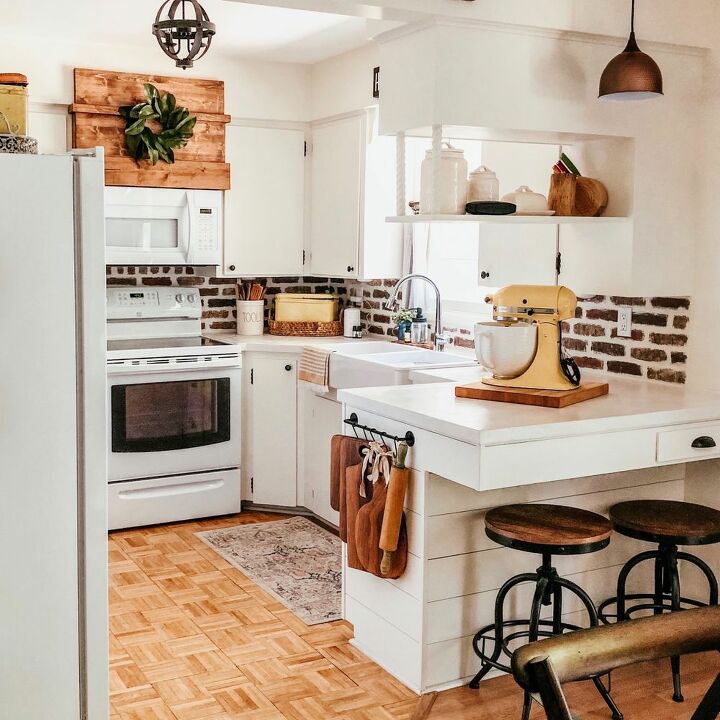
The shelves run all the way to the wall, but I could never put anything back there without having to take everything back out to get to whatever was back there. So annoying!
For this project I used:
- cabinet door
- tape measure
- tape
- drill
- Dremel oscillating multi-tool
- sandpaper
- stain
- paint
- router bit
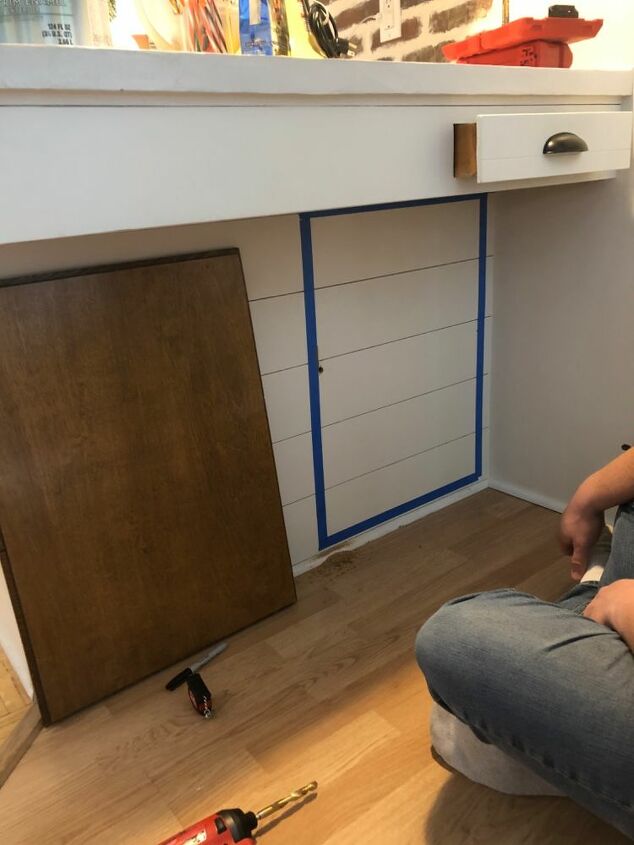
After pondering this idea for years, I finally brought the cabinet door upstairs and taped off the size of the hole that needed to be cut. The inside of the door has indents around it, so I made sure to get my measurements from the edge of each indent. Then I got really nervous and had to recruit my guy for help! 😅 He checked my measurements and drilled a hole big enough for the jigsaw blade to fit in.
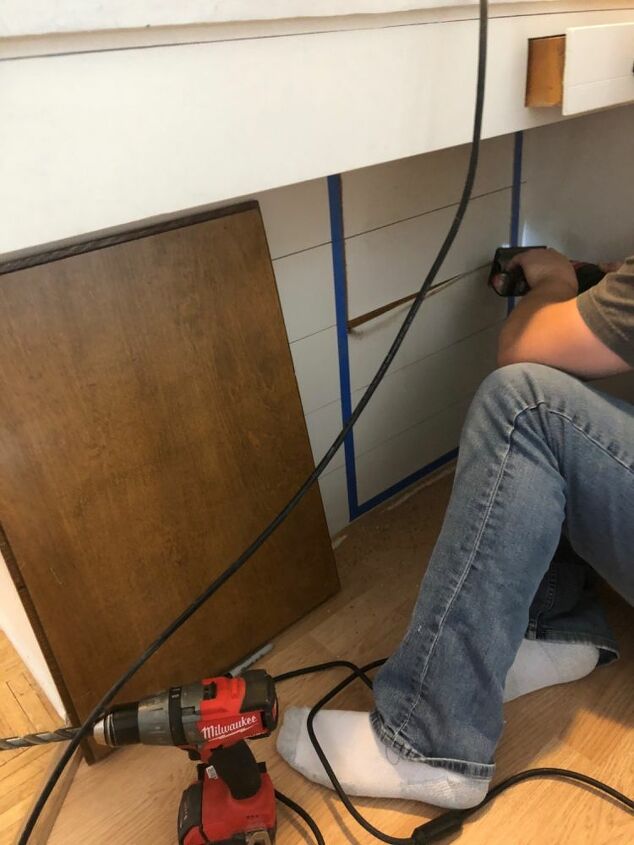
Then he just started cutting away my beautiful kitchen!!! I was real terrified at this point. 😂🤣🤣
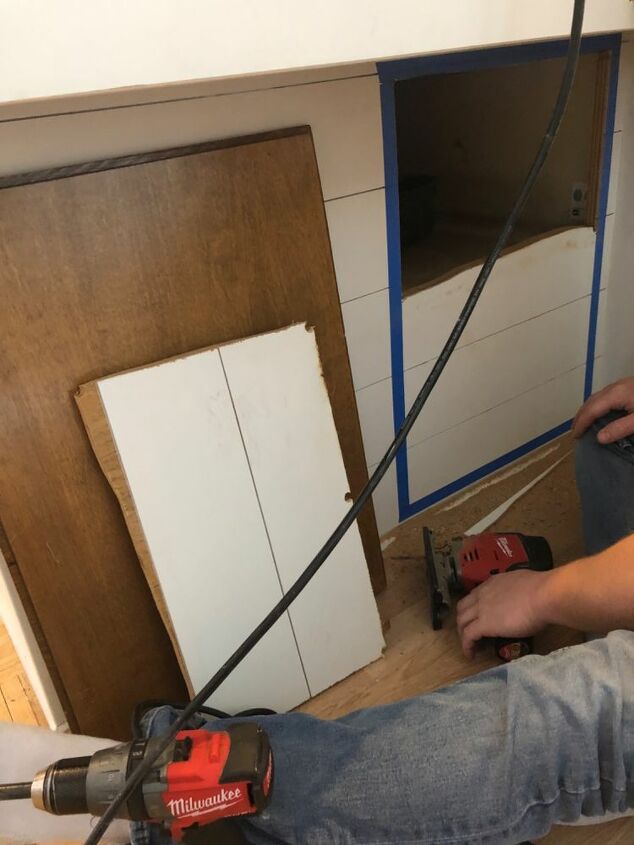
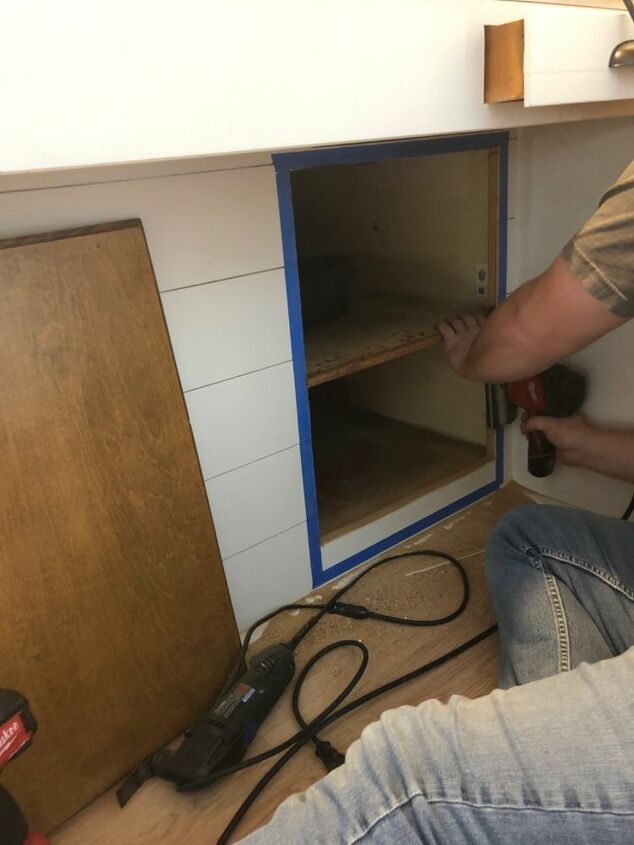
He used our Dremel oscillating multi-tool to cut around the areas in front of the shelf, so he didn’t cut through it.
When he was done, I pulled myself together from my little freak out and sanded all the cut areas, touched up the stain on the front of the shelf and painted the rim of my new cabinet!
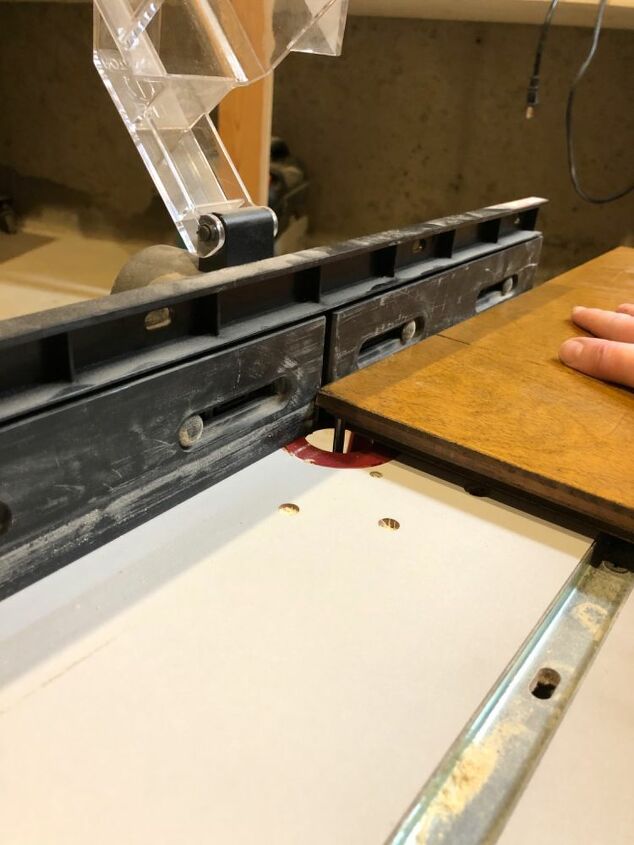
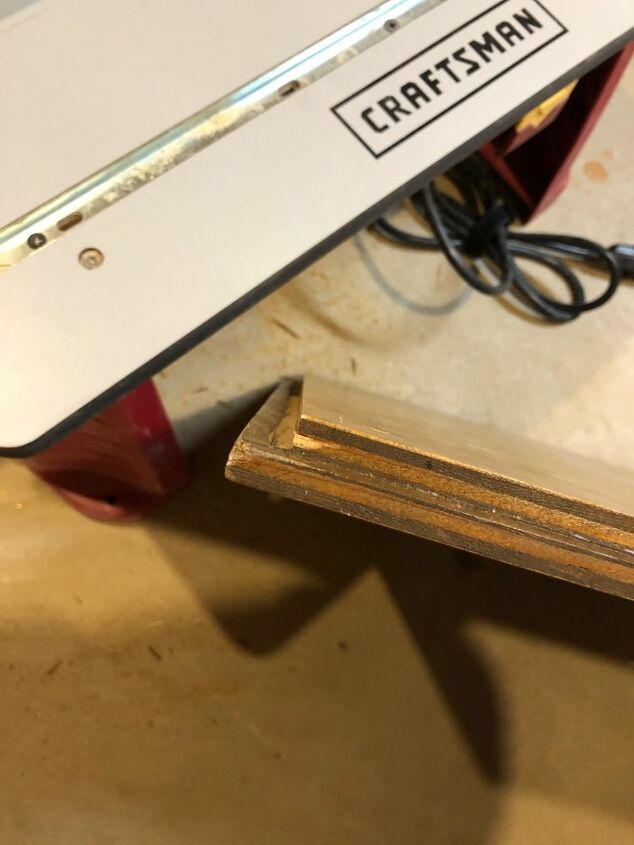
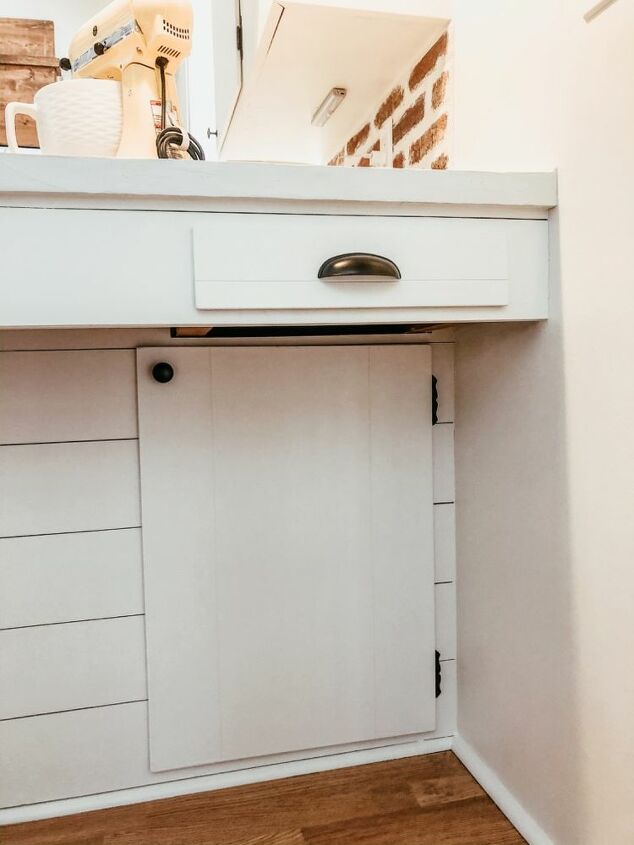
It couldn’t be that easy though!! As you can see from the above photos, he couldn’t cut the hole as big as the cabinet door needed to be because of the bottom shelf, so the door didn’t fit.
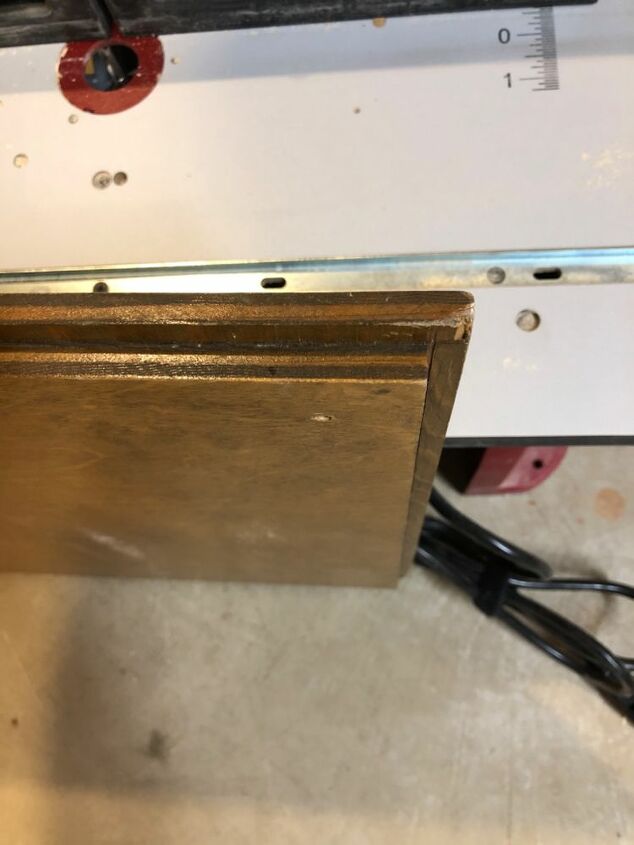
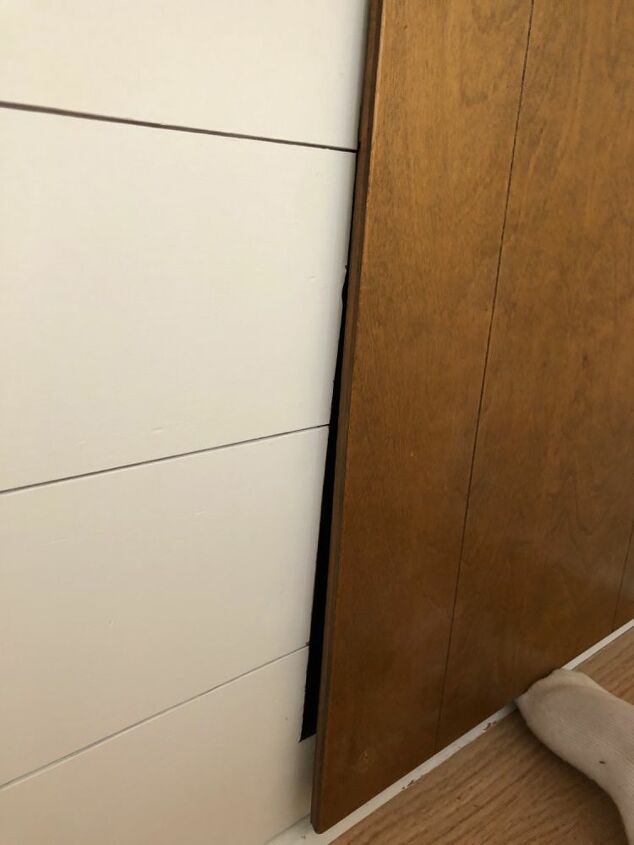
Instead of cutting the door and it not being proportional on the breakfast bar, I decided to make the bottom indent higher with my router and router table. I needed to route to the little black mark about 1.5” from the bottom.
I only had a 1/4” straight bit for my router, so I set my router bit to the right depth and positioned the guide a little under 1/4” where I wanted it to cut.
Easy peasy!
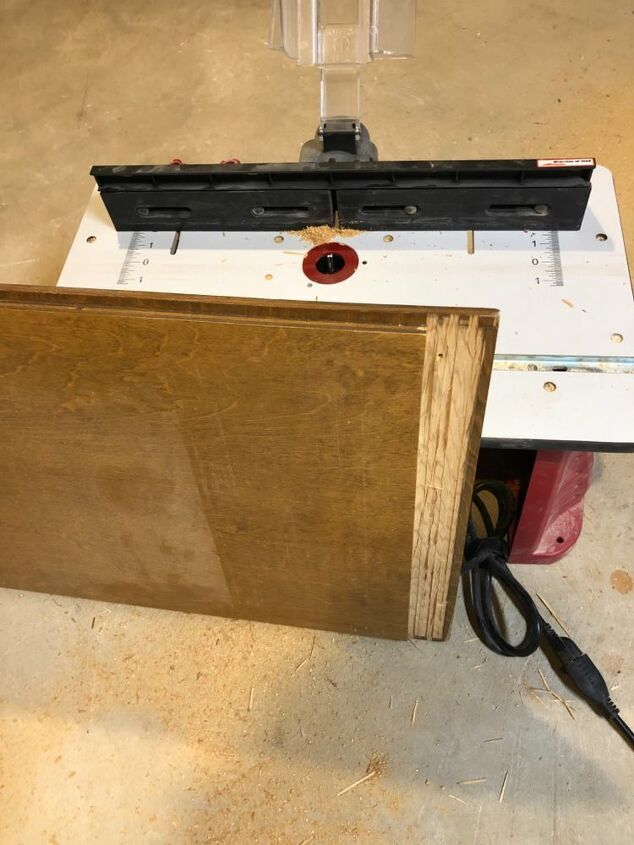
I moved my guide back 1/4” for each pass until I got to my mark then sanded the bottom with 80 grit sandpaper to get it nice and smooth.
It fit perfectly! I painted the cabinet door the same way I painted the rest of my kitchen cabinets. You can find that tutorial here and be sure to follow me on Instagram to see more of my crazy ideas!
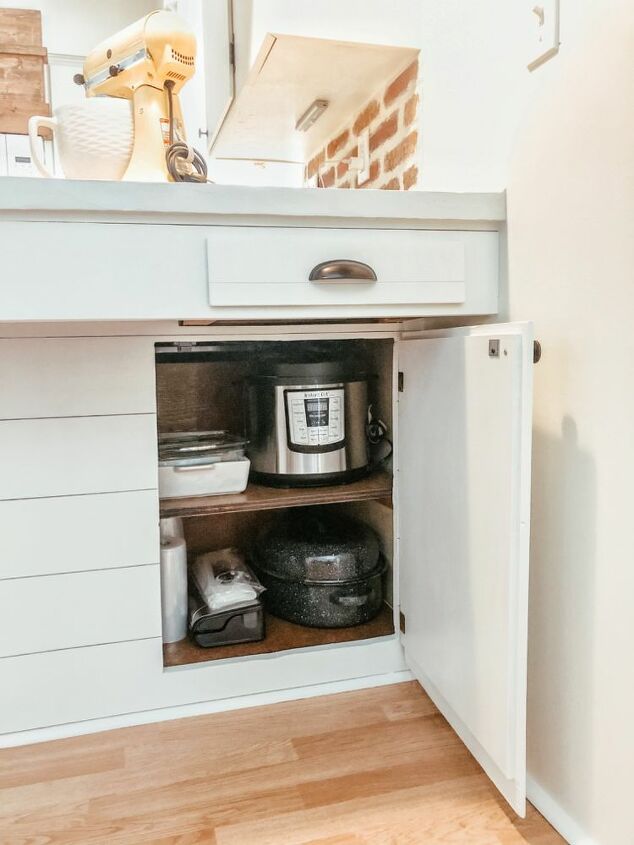
I love being able to use this space now!!!
Since the door and hinges match the rest of the kitchen, it looks like it was built this way! Moral of the story, don’t be scared like me, and go for it!!! 🙌🏻😍
Resources for this project:
See all materials


Comments
Join the conversation
-
We did the same to ours. We also had an upper cabinet the same way. We updated our kitchen and had the cabinets refaced. New doors were made for them to match. I didn't want them to be too noticeable. Invisible hinges were used, and the handles are notched underneath. It's amazing how much storage space was captured.
-
Did to ours while back. Had when I was a kid too. Mom stored cereal in it as next to table. As time went on mom stored ironing in it when full she would send ironing out so she was happy, until cat had kittens on clean clothes (lol). Me I store craft supplies in space which is where I have always stored but now more accessible and I don’t have to much of any one item


Frequently asked questions
Have a question about this project?
Could the door be covered to match the shiplap or use a sharpie to match. The door wouldn't stand out so much
I just have a comment. We have a similar cabinet under our peninsula facing outward to the dining room built in by our contractor. After 33 years of having to get on my hands and knees, or break my back bending over to access the items in this deep cabinet, we finally had three drawers built in so we can easily access the items in the cabinet. What a lifesaver!! Love how you bravely took in this project!
Did the person doing the power saw have any toes left when done? It is a major mistake using power tools without adequately protecting your extremities.