


DIY Lampshade Makeover: How to Create a Glamorous Lampshade

Are you tired of the boring and outdated table lamps in your home? Upgrading your lampshades can be a quick and easy way to give your space a fresh and stylish new look.
In this DIY lampshade makeover, I will show you how to transform an old thrifted lampshade by adding beautiful lace appliques.
This post was transcribed by a member of the Hometalk editorial team from the original HometalkTV episode.
Hometalk Recommends!
You can make a classy lampshade with only a few basic materials, and it will cost you much less than a designer one.
Let's get started with our project on how to decorate a lamp!
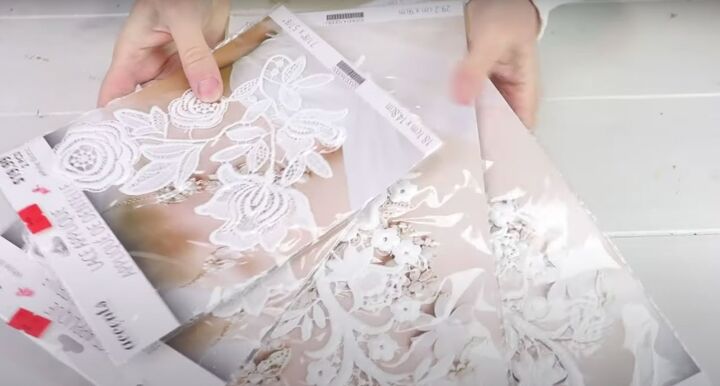
1. Gathering Materials
To begin my lamp makeover, I headed to my local fabric store to find some lace appliqués. After searching through the wedding dress section, I found a set that caught my eye. Normally, they would have been quite expensive, but I was able to snag them from the discount rack at 75% off.
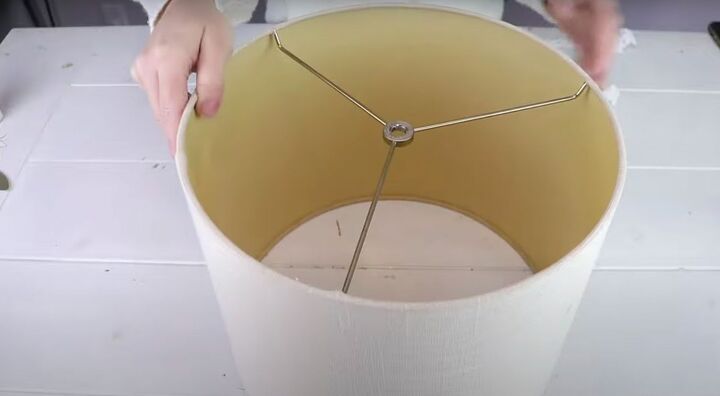
I was also lucky enough to find a thrifted lampshade at my local store for only $3.
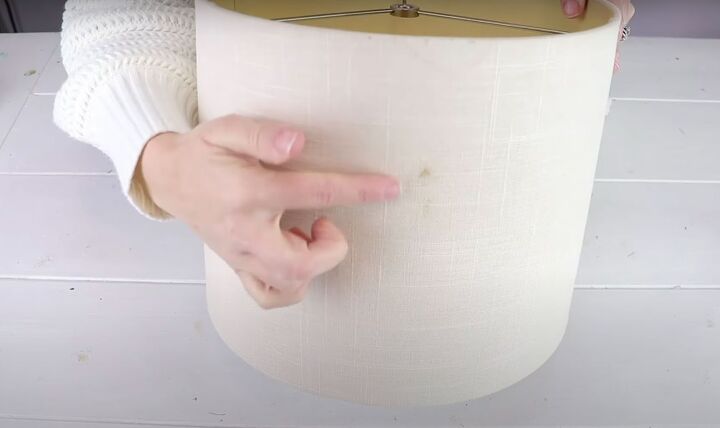
It had a few small stains but I knew I could cover them up with the appliqués.
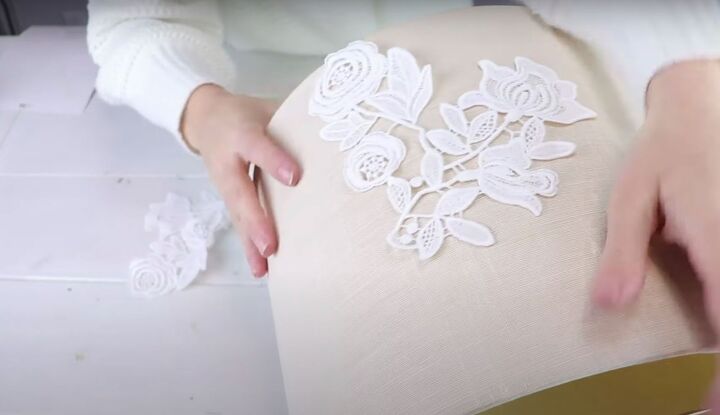
2. Placing the Appliqués
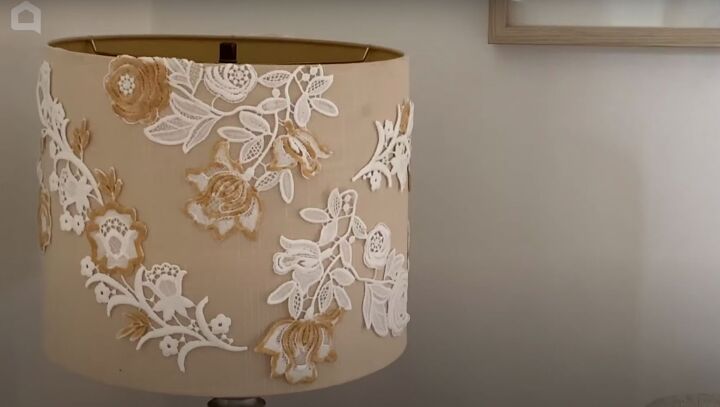
Once I had all my materials, I started the creative process of arranging the appliqués on the lampshade. This was done by positioning appliqués of different sizes and shapes to add texture and variety to the lampshade's surface.
A few were added to the top and bottom of the shade, and some in the middle, until I had a design I was happy with.
To ensure that the appliqués will be glued down correctly, I marked out the placement of each with a pencil. They had a stickiness to them from the packaging, so they stayed in place while I was arranging them.
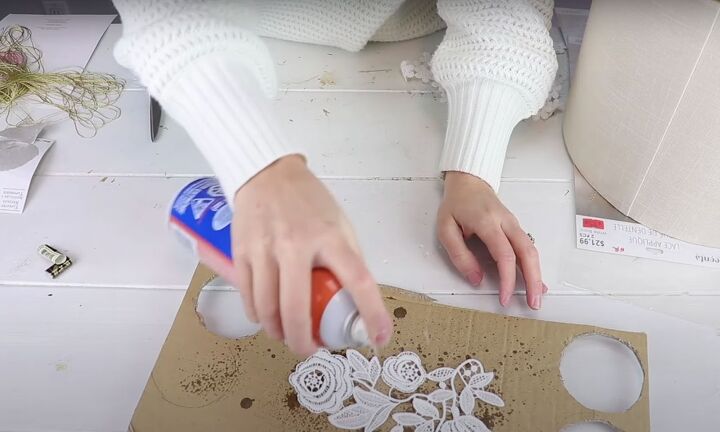
3. Attaching the Appliqués
Next, I used a spray adhesive to secure the lace appliqués to the lampshade. The adhesive was applied to the back of each and then laid in place on the lampshade. I made sure to saturate the appliqués with the adhesive so that they would stick well.
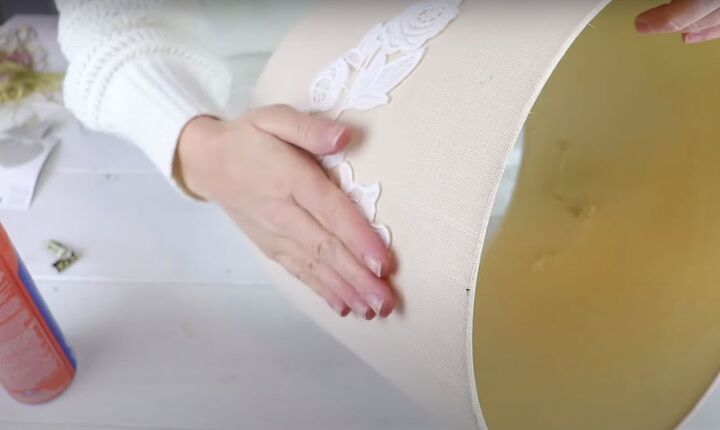
I carefully laid them in place on the lampshade.
To make sure they firmly adhered, I let them sit for a few hours.
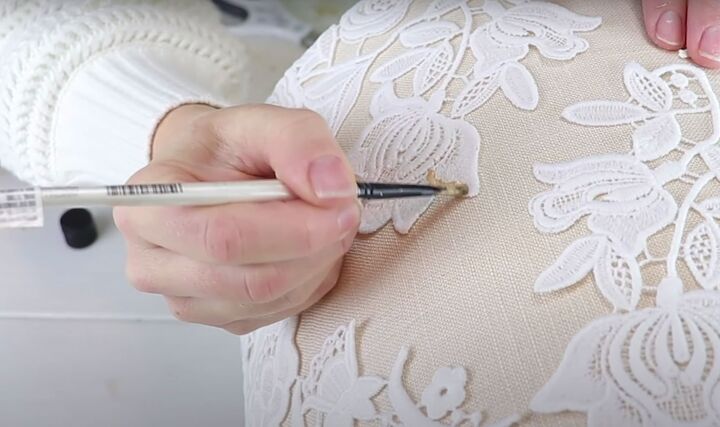
4. Adding a Touch of Gold
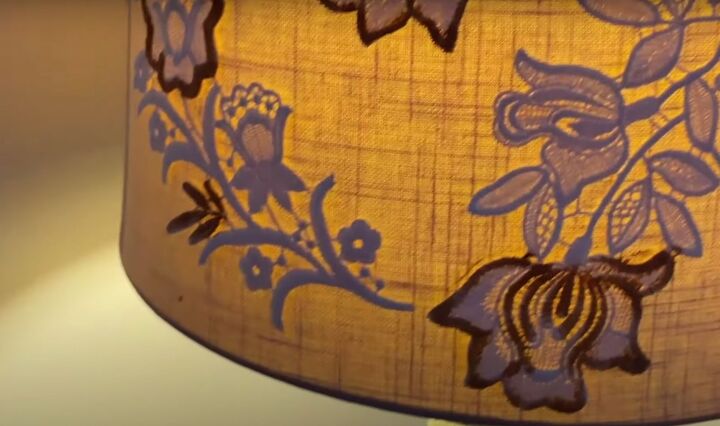
After the appliqués were attached, gold metallic paint from Deco Art was used to add dimension and depth to the lampshade. I used a small brush to apply the paint to highlight the details of each appliqué. I achieved a crisp, gold metallic color without the paint soaking in too much.
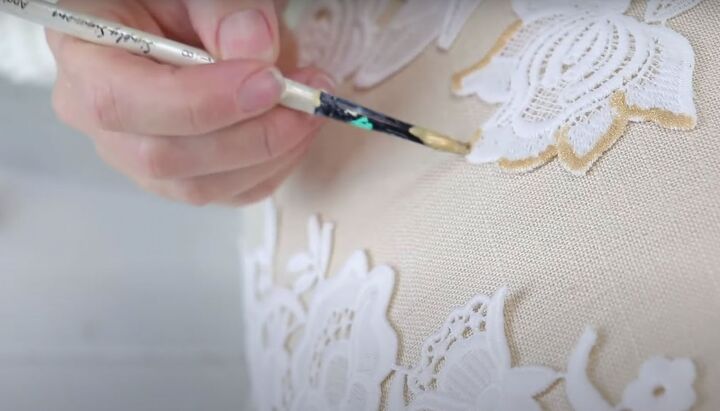
I only painted certain areas of each appliqué, focusing on the flowers and leaves that were sticking out.
5. Completing the Lampshade Makeover
As soon as the paint had dried overnight, I hung the newly designed lampshade on the lamp base. I was thrilled with the result.
This Anthro lamp dupe project transformed an ordinary thrift store lamp into a beautiful and unique home decor piece.
More Lampshade Makeovers
How to decorate a lamp tutorial
This DIY lampshade idea was an excellent way to breathe new life into an old and outdated piece of décor.
I hope this lampshade decorating idea has inspired you to create your own shabby chic thrifted lamp. I'm excited for you to see the results of your hard work and creativity! Please share how your project went in the comments below!
Resources for this project:
See all materials


Comments
Join the conversation
-
Very pretty and creative.
-
A great idea! From boring to posh, thanks for the share.


Frequently asked questions
Have a question about this project?
FYI -- you can also use fabric high/low temp hot glue (gun)-- and not have to spray adhesive fumes around or breathe them ... A little dab'll do 'ya ... very fast, easy to do/use, & you CAN remove/change around the appliques if you're not happy with your creation! We use the hot glue/gun in making lined/finished drapery panels. The fabric gun has a narrow tip for finer sized work. HOT GLUE is a gift from heaven! Wonderful project on the shades!!!