


DIY Pond and Waterfall Tutorial – Solar Powered!
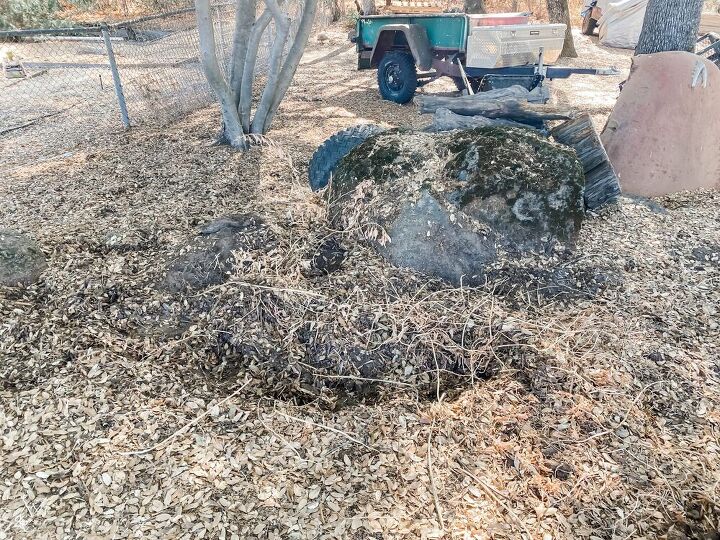
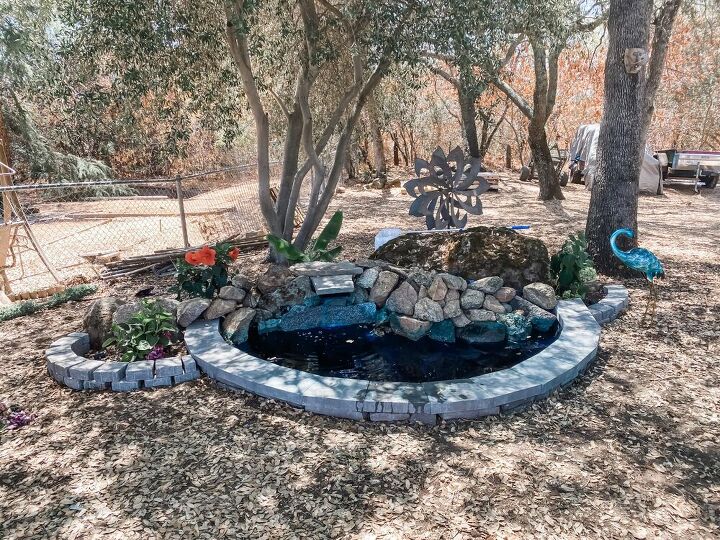
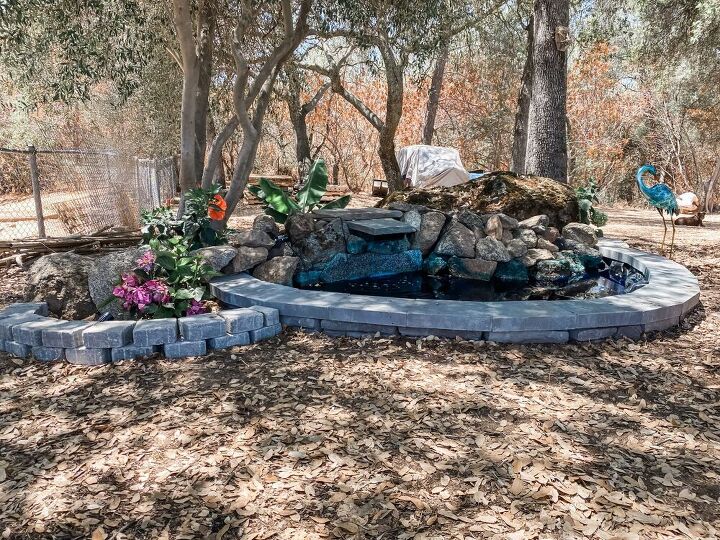
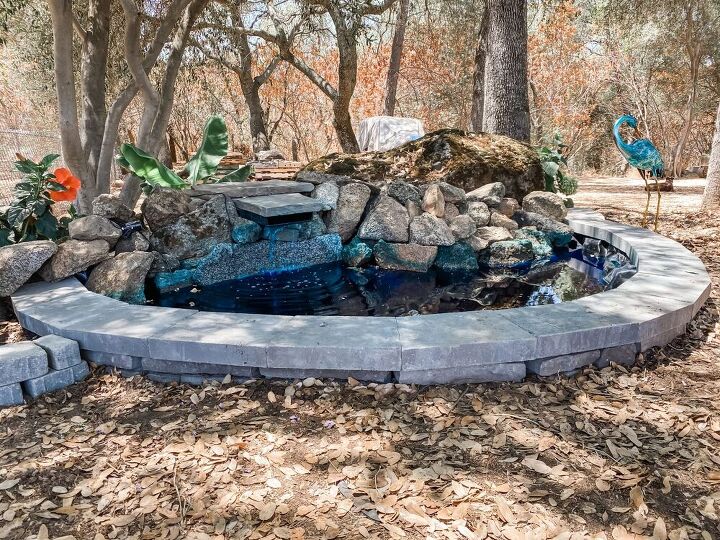
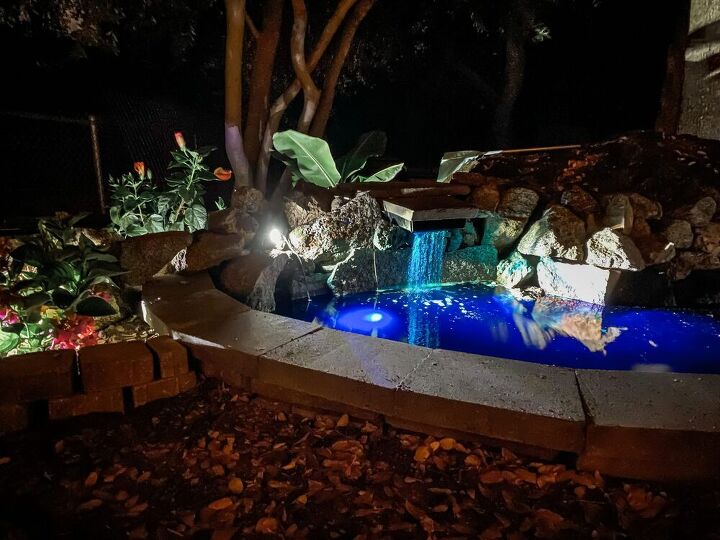
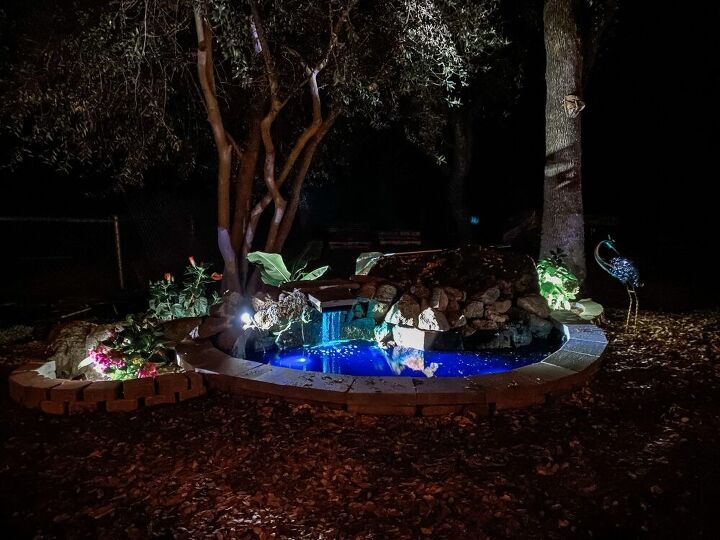
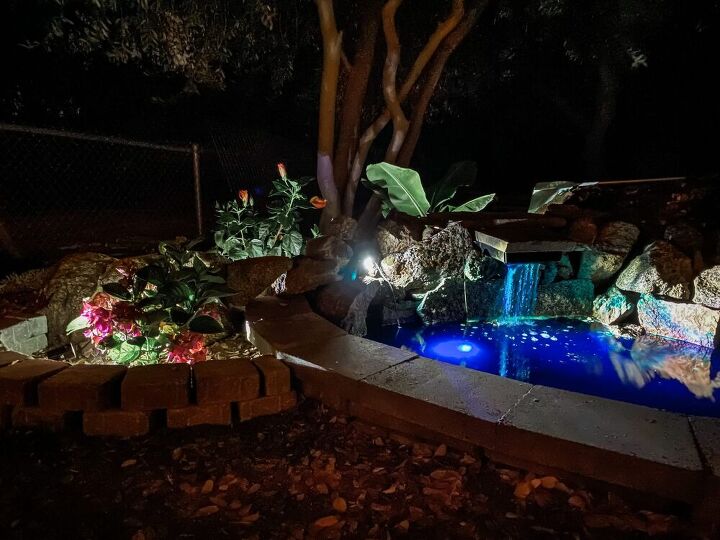
I absolutely love water features, I find the sound of running water calming and soothing. So, I have been working on a couple new water features in my yard, and today I’m sharing one of them. I have this large granite boulder in my back yard that looked a little boring, so I decided what better way to spruce it up then to add a beautiful DIY pond and waterfall, and, since we don’t have electric power in this area, I chose a solar pump with a backup battery to ensure the waterfall was running for a large part of the day without having to run extension cords throughout the yard (plus I love using green energy whenever possible!). I also added in some solar lights both in the pond and around so it looks spectacular at night!
Here is a brief description of the process i used to create the pond. For full instructions and more pictures, please visit my blog post here.
To build the pond, I first dug the hole in the area for the pond.
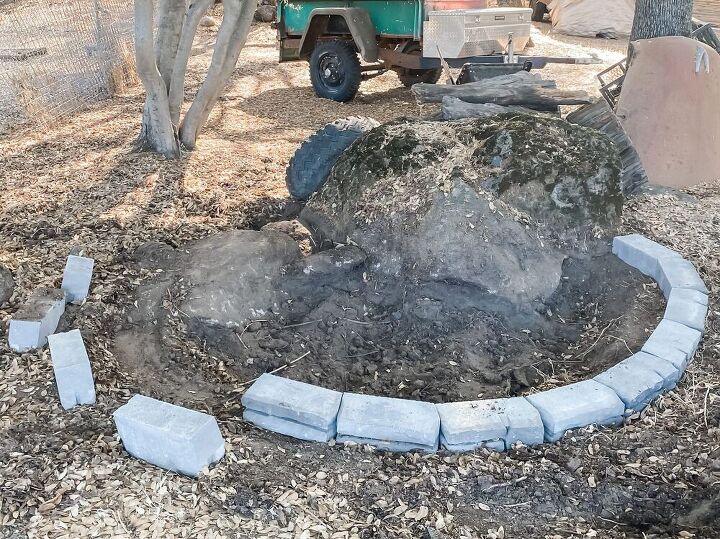
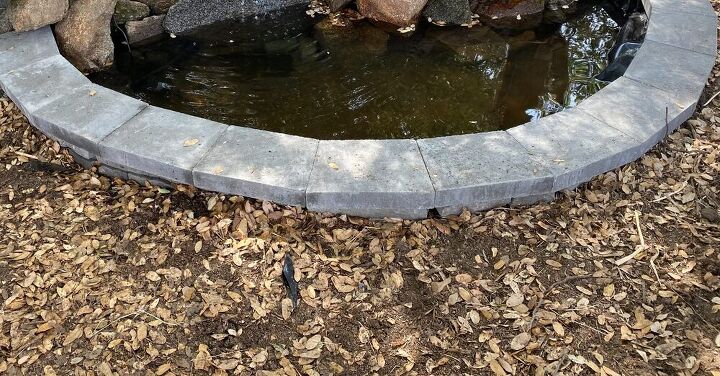
Once the pond area was dug out, I used one row of concrete retaining wall blocks to outline the pond. I ensured the ground underneath the blocks was level.
Once all the retaining wall blocks are in place, I placed the liner into the pond area.
I used the retaining wall caps to hold the liner in place. I used my concrete saw (bought used on Facebook Marketplace) to cut the retaining wall caps so they line up evenly next to each other.

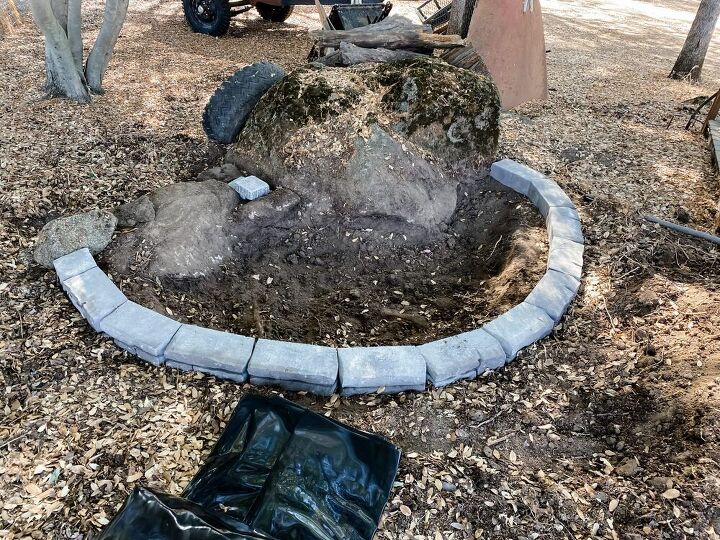
Once the two adjoining block cap sides are cut, they should line up perfectly on the top of the retaining wall blocks/pond liner. Use landscape adhesive to adhere the pond liner to the retaining wall blocks below, and then on top of the liner to adhere the retaining wall cap blocks to the pond liner and the retaining wall blocks below.
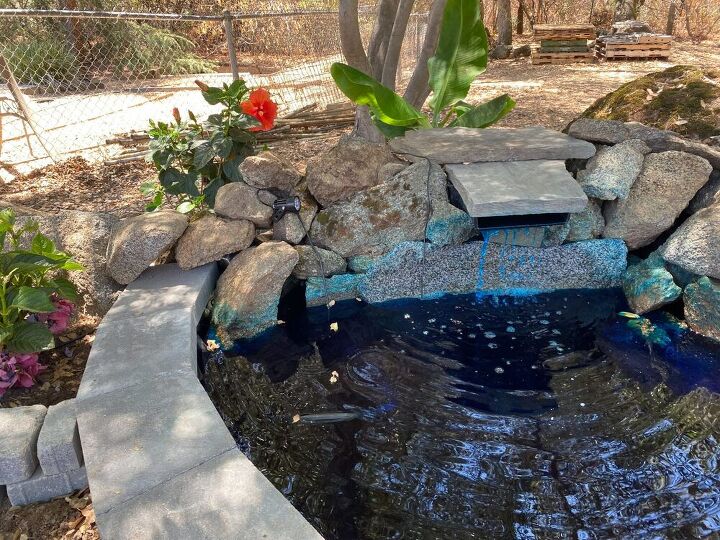
Next, if building the pond with a wall or rock backing, use large boulders and rocks to hold the pond liner against the rock backing.
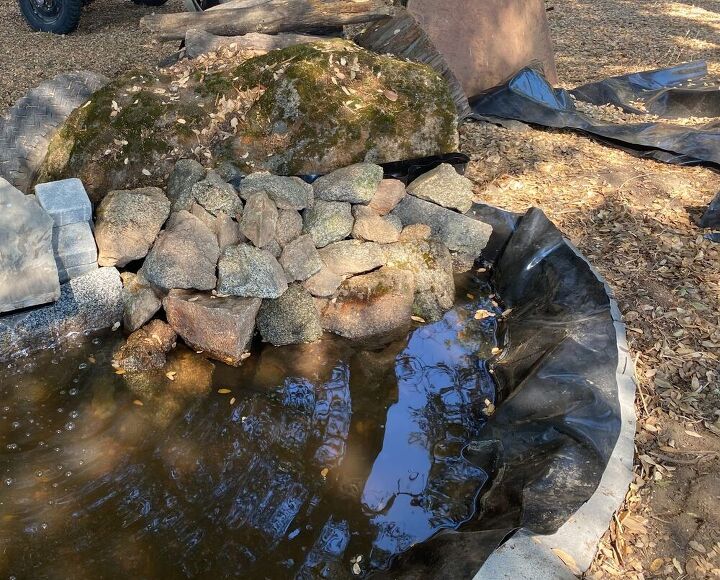
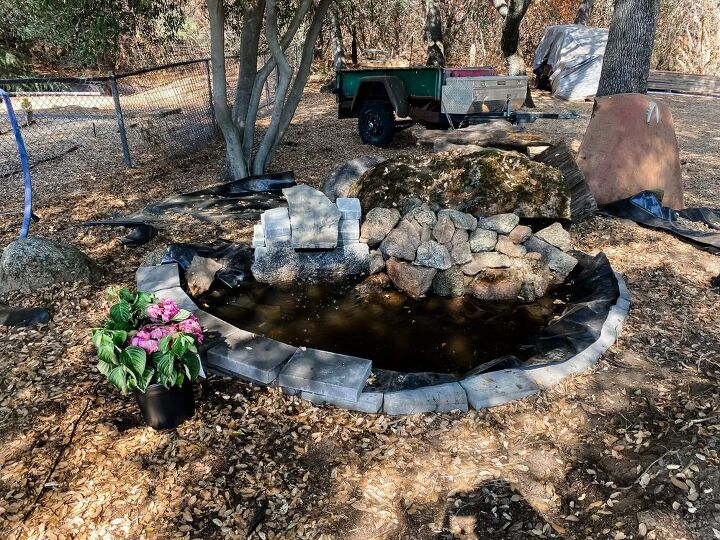
Next, install the water pump and waterfall spillway.
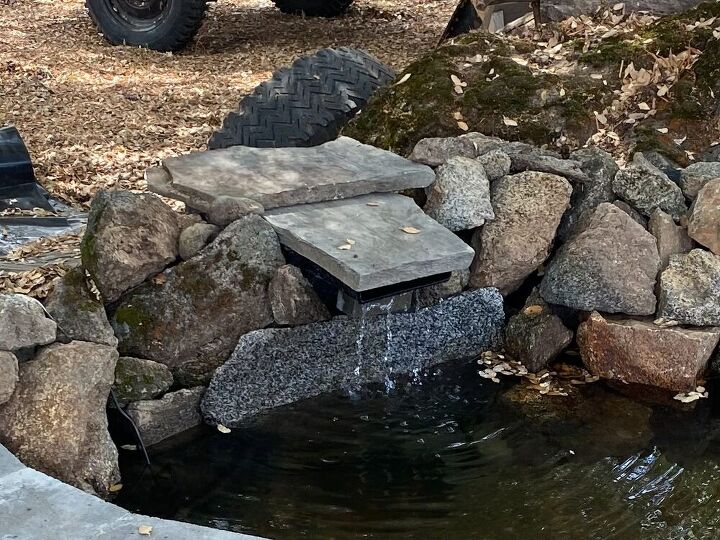
Next, fill the pond with water and move the solar panel into the sun light.
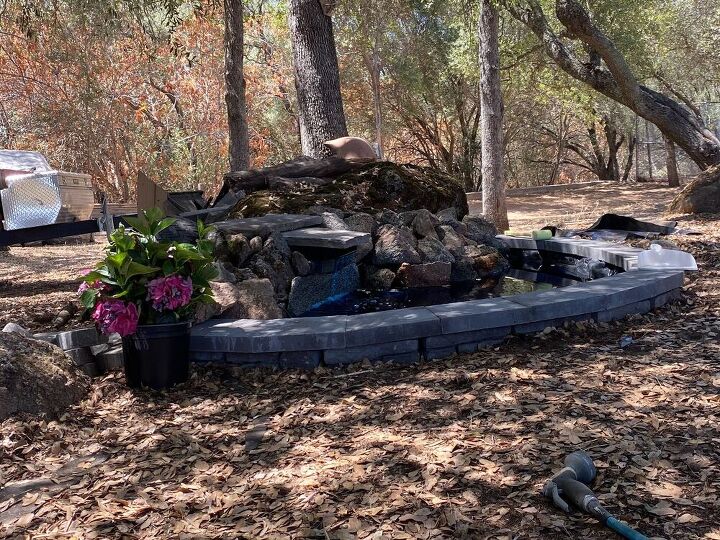
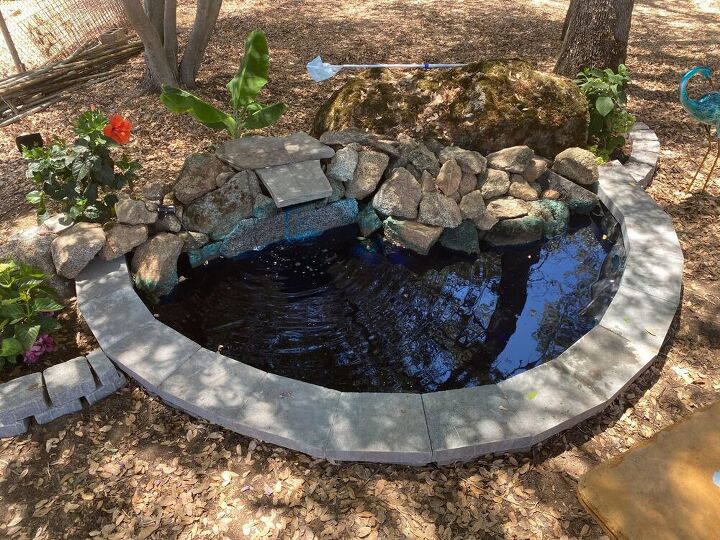
Once the pond was complete, I added in the plant borders around the pond using square pavers and landscape adhesive. I placed the concrete paver plant borders on three sides of the pond.
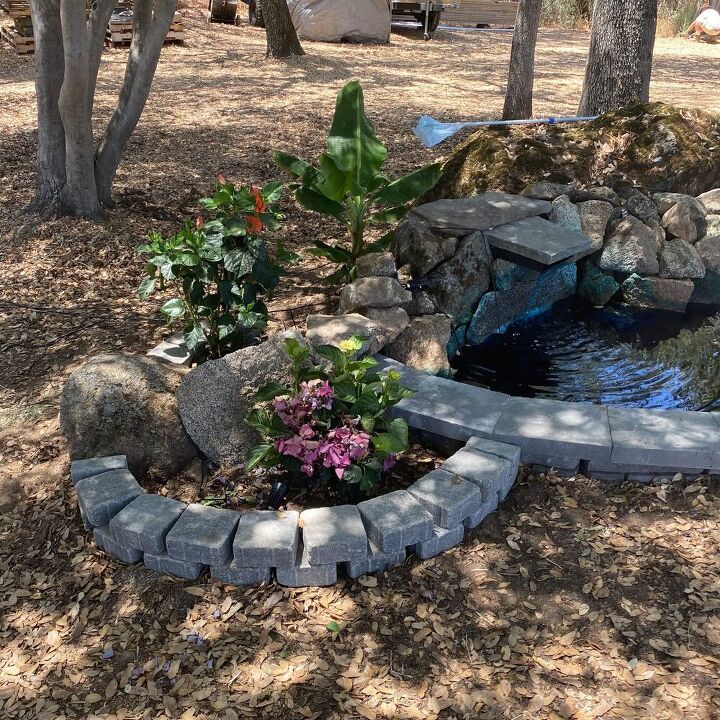
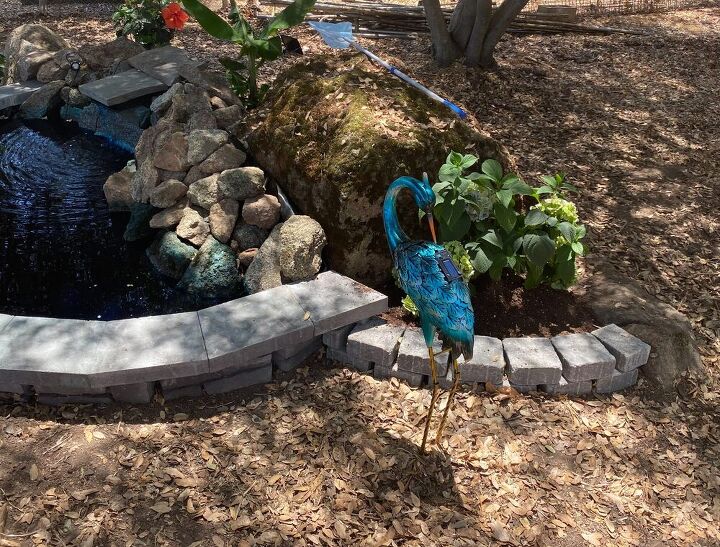
The plants I planted in the planter sections are hydrangeas (pink in the left front planter, and blue in the back right planter), and then a hibiscus and a banana plant in the planter behind the waterfall.
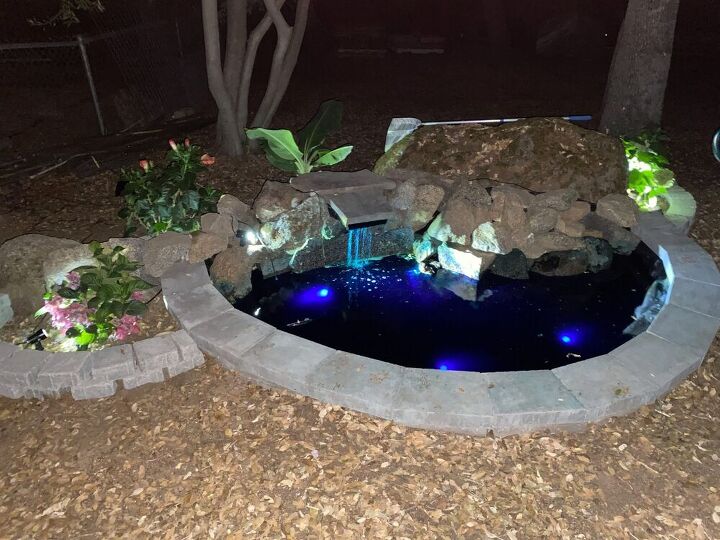
To add even more tropical ambience to my little pond, I added solar lights both in the pond and around the pond. Here are some pictures of the DIY pond with waterfall at night:

This pond project was fairly simple, the only major tool required is a masonry or concrete saw, which if you don’t have, can be rented at Home Depot or through other tool rental companies. We purchased ours, which is a heavy duty saw, used, on Facebook Marketplace for much cheaper than it would cost new. But if you already have a circular saw or table saw, you can buy a masonry blade and use that. The entire project can be done in a couple of weekends. If you already have all the tools, the entire project, including the liner, retaining wall blocks and wall caps, solar water pump and waterfall parts, plants, solar lights, and the statue, cost about $500 total.
Resources for this project:
See all materials


Comments
Join the conversation
-
Looks beautiful. You did a great job
-
Wow! Seems so relaxing


Frequently asked questions
Have a question about this project?
Would love to know size and source of solar pump you used, especially with battery backup. This is so lovely. Thanks.
how do you keep the water clean?
DO YOU USE ALGAECIDEINTHE POND ?