


How To Make A Epoxy Resin Table Top

In this project, I’ll be sharing my experience with creating a neat little epoxy resin table for my two-year-old daughter. The back story is she loves to follow me from room to room, and I love having her around me. Being a content creator I am always on the computer trying to get work done. As long as I'm in her sight that’s enough. I made her a desk awhile back, but that was too bulky to lug around. This is why this table came about. For our purpose, it’s a kids table for others this would make a perfect nightstand or end table. The same concept can be applied to any surface. The resin I’m using is from countertop epoxy there is certainly many brands out there this is the one I have experience with. I went with epoxy because it’s durable and easy to maintain. The more layers you have the more you can wet sand it to remove scratches. I used Countertop epoxy" Click Here "
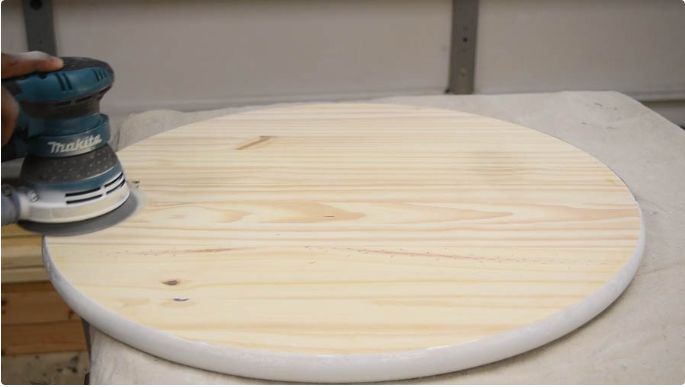
Step 1: Getting Started
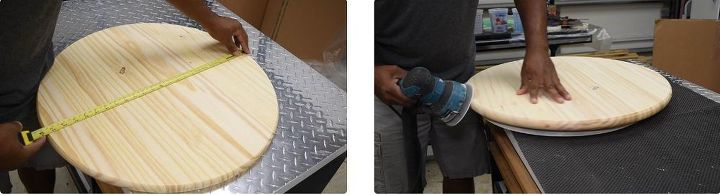
Chose your tabletop, I used an edge-glued panel round board. Then sand it down with 120 grit followed by 220 grit. Think about the base color you would want to use, in the project I used white. Since this project, I learned that it’s best to apply a primer coat on the raw material. This should prevent the exposed grain Issue I ran into later on in the project.
Step 2: Mixing The Epoxy
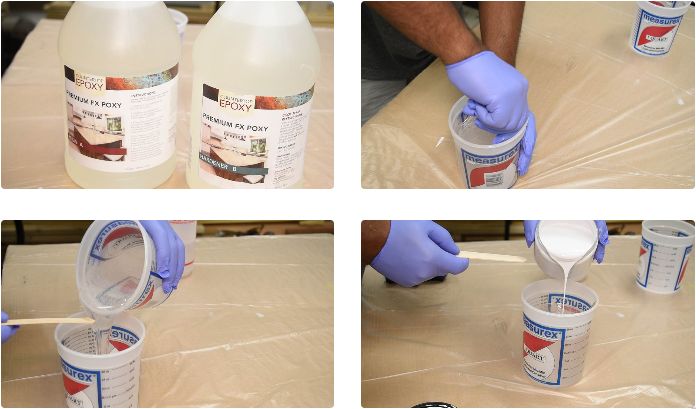
The epoxy used in the projects is a 1 to 1 mix. One part hardener one part resin. If you check on countertop epoxy website you will find a chart to help you with square footage coverage. 24oz. of resin was just the right amount for this 24-inch table.
Here is the mixing process I used:
- 12oz. Hardener part B +12oz. Resin Part A
- Pour the hardener into a mixing cup first follow by the resin
- Mix this for 5 minutes
- Pour into a new container and add your base color and mix for 4 more minutes.
- You’re now ready
You will repeat the same process for each pour. For the final coat, I just used the resin with no color.
Step 3: The First Pour
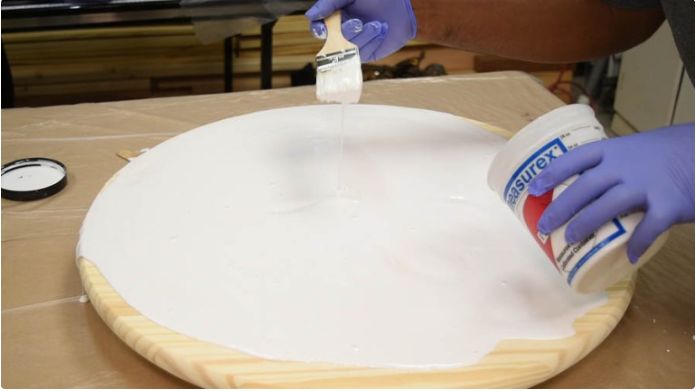
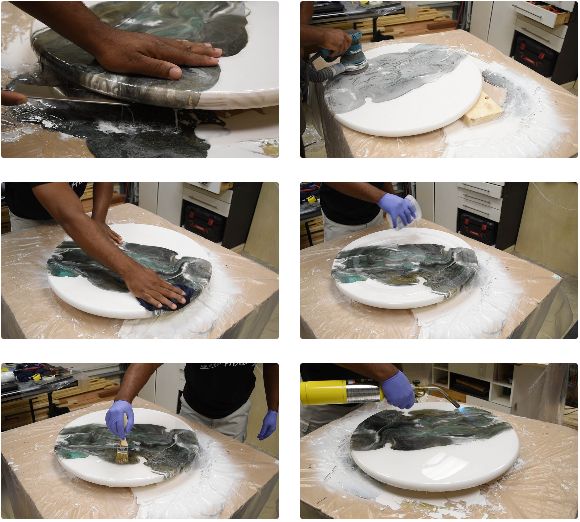
This was a two-part process. The first pour was the base (I went with white). After pouring the resin on the workpiece, I used a brush to evenly spread it. It also helps if you’re on a leveled surface. Now you’ll need to remove the bubbles. I tried a heat gun and I was not a fan, I like the torch better. This part is quite simple, start from one end then work your way to the other. Keep the torch moving, once you’re done it should look like glass.
Now, begin your second pour, adding all the colors you will want to see in the mix. Once you’ve mixed the second container of epoxy, you will transfer it to a new container (I used plastic cups) then is when you’re going to add your individual colors.
Step 4: The Second Pour
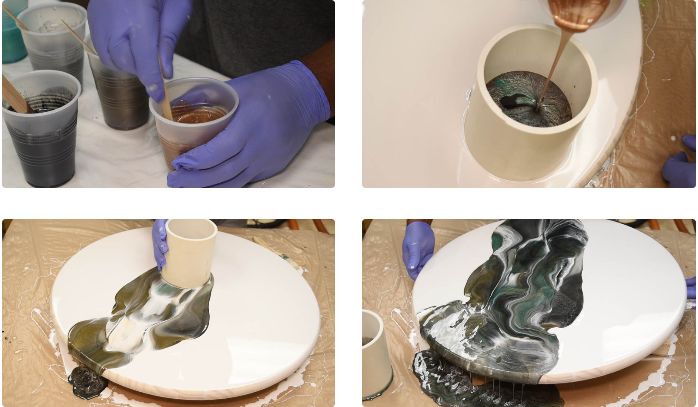
For the second pour, I used a dirty pour technique. I used a total of 5 colors, but you can pick all the colors you would want to see in the end result. I then took a piece of 4-inch pipe and placed it on the white base. Make sure you have everything prepped and ready to go, it’s best if you do all of this within 30 to 45 minutes of pouring the base.
Now, pour all the colors into the PVC pipe. Do not mix it! Next, slightly spin and lift the PCV tube and push it in the desired path. It would help if you draw out a pattern path first, rather than to try and figure it out while in the motion. I kept it simple; I push the resin in one direction then back. You can try anything you like, swirling the pipe, zigzag, or whatever comes to mind. You can even tilt the workpiece to create movement in the design. Once you get the pattern you like, take the torch and remove the bubbles. Then, let this sit for 24 hours.
Step 5: Day Two
Inspect your work piece, if that looks good then you are set. As I said in the video I, ran into some mishaps, so I had to address that before moving on. Had my process worked out in my favor I would have been done. Adding a layer of clear coat would only help and I would still recommend it, especially if you love the design. An addition clear coat adds protection. I’d recommend lightly sanding it with the following 120grit, 220grit and 400grit prior to pouring the clear coat.
Remove the sand dust with a wet rag. Make sure the surface it dry. Mix up enough resin to cover the top and then pour it on the work surface. Take a brush and spread it followed by the torch. Let this sit for 24 hours.
Step 6: Day Three
Clean up the hardened drips on the bottom.
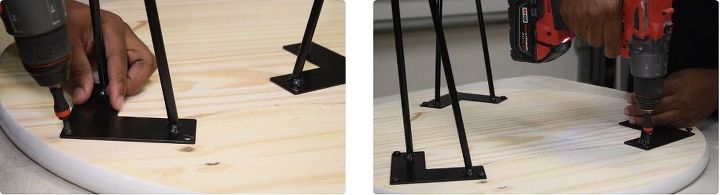
Step 7: Add Legs
For this project, I used hairpin legs to keep things simple. Feel free to go in any direction.
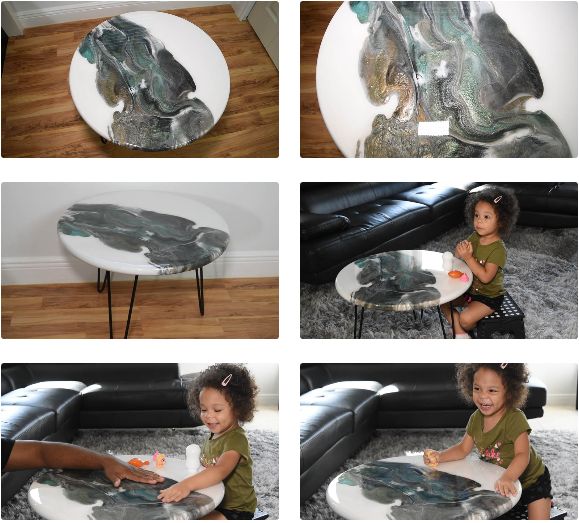
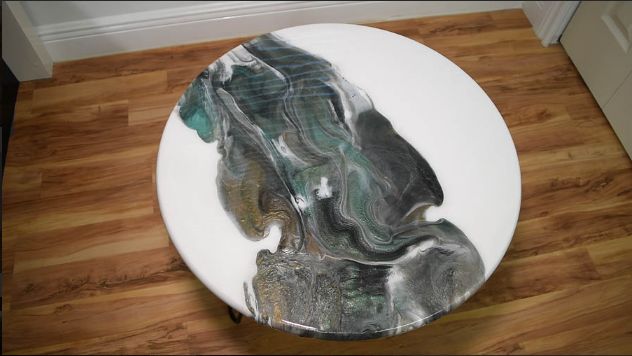
Step 8: Final
Here is the finished product and Lia is enjoying her new table. I hope you enjoyed this post if you did I would love to hear what you think about it. Let me know if you have any questions. Thanks for stopping by, and check out my links below to stay up today and see what’s next to come.
You can also find me here:
Youtube , Instagram, Pinterest
Resources for this project:
See all materials


Comments
Join the conversation
-
Thank you for this easy and great idea. I have and end table I will do this with. I love the color combo. Your daughter is precious.
-
That table is almost as beautiful as your daughter!


Frequently asked questions
Have a question about this project?
Could this be used outdoors?
Nice work, beautiful little table. One question: is there a noticeable change in the surface elevation between the pours (where the colored part meets the white base)?
How to clean the silicon cup after use