


Quonset Hut Shaped Hot Tub Enclosure

- I’m sharing a project my husband and I completed last spring 2018. We needed some kind of inexpensive hot tub enclosure with a canopy/cover that would fit our 9’ wide x 8’ deep x 6’ high space. The structure also needed to be strong enough to withstand high winds and heavy snow. We looked at various reasonably priced canopies, but none of them fit our space or were beefy enough to withstand extreme weather. We decided to come up with something we could build ourselves that was inexpensive and could be completed in a few days. We based our design on a project posted by another hometalker who shared her shade cover that she built using pvc plumbing pipe and fabric.
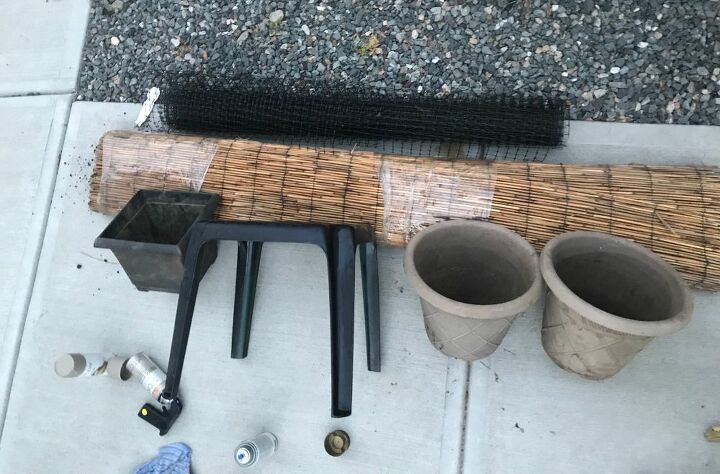
I gathered up some random items that I thought we could use. We also had lots of wood, leftover bags of concrete, tape, screws and, other hardware stored in our basement in addition to some left over sections of pvc fence trim. I was hoping that my husband could make the shorter pieces of pvc trim work rather than buying pvc plumbing pipe.
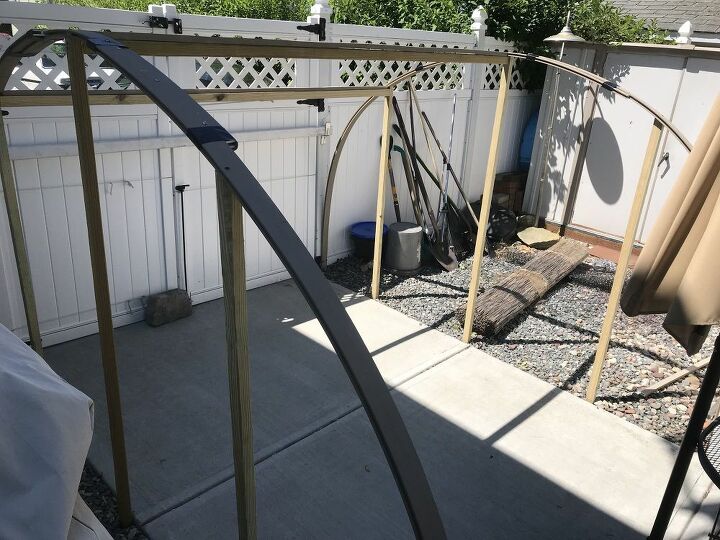
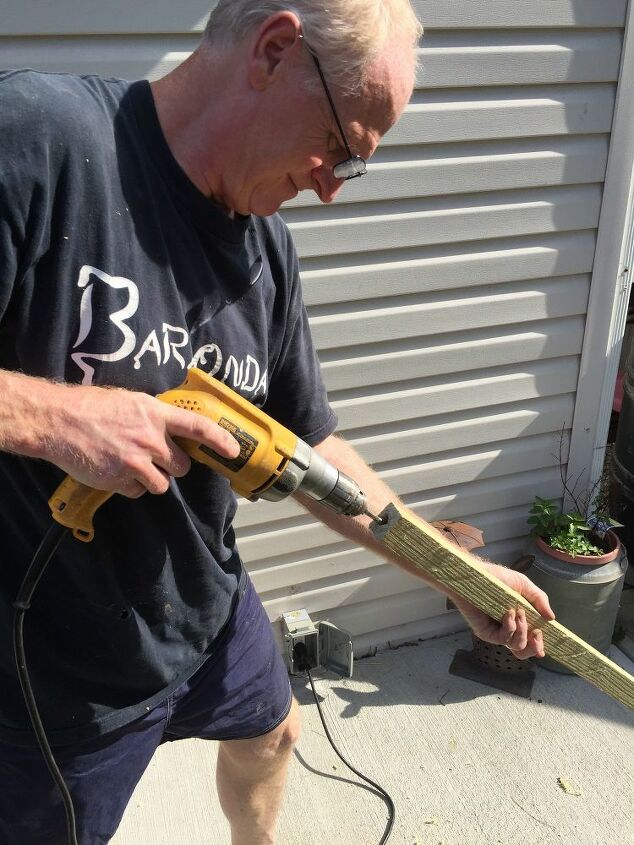
My husband is an engineer and very skilled at home renovation so he was able to build a sturdy frame with the shorter pieces of pvc and some of the materials I gathered up. Here’s a picture of the wood and pvc frame be built. He used 2x2’s for the wood portion of the frame. He also ended up adding a few more horizontal supports after this picture was taken.
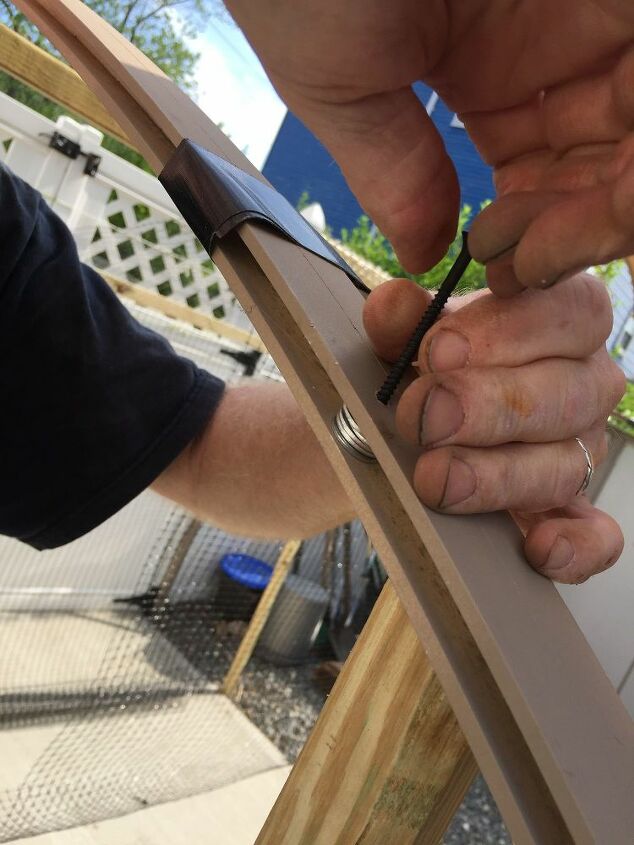
My photos aren’t detailed enough to show how he connected the short pvc pieces together so they wouldn’t come apart when flexed over the frame. He overlapped the pvc sections and used screws and locking nuts to hold them together before he wrapped each joint with electrical tape to cover the sharp edges of the nuts.
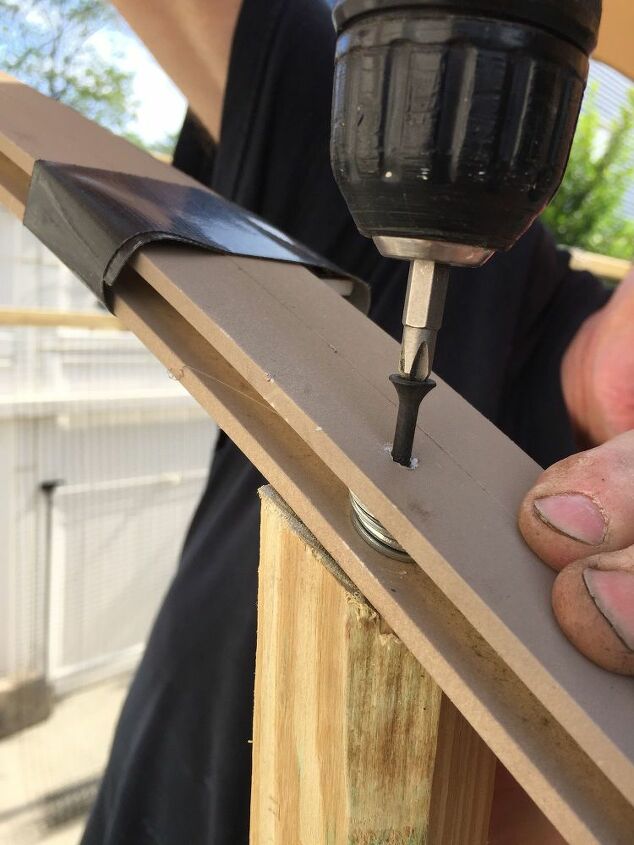
Since our pvc pieces were tongue and grove, he used washers to fill in the space before securing the pvc to the wood frame.
In order to keep our enclosure from blowing over my husband screwed holes in the feet of the frame so he could slip them over rebar that he cemented into the ground.
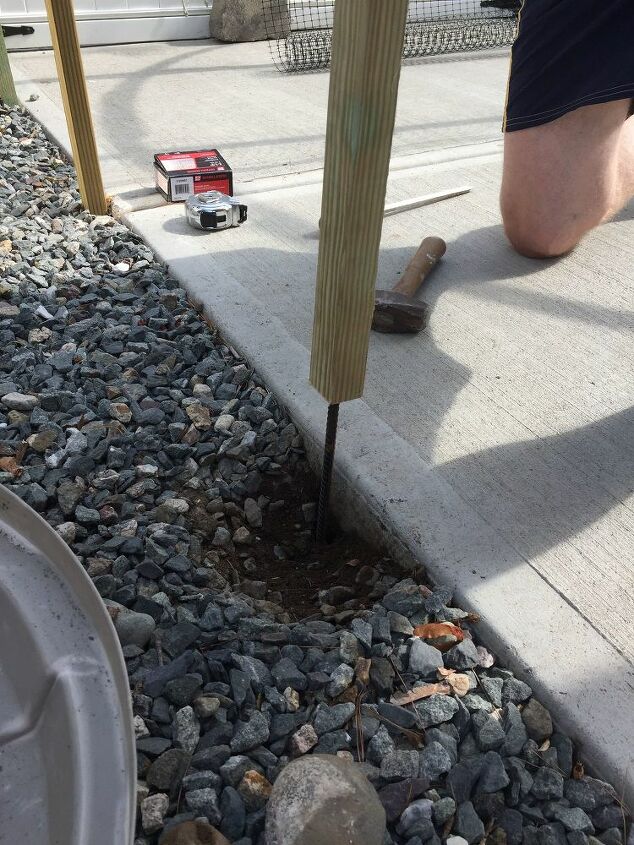
We slipped the two back feet over the back rebar first so we could squeeze the frame enough to slip the front feet over the front rebar supports.
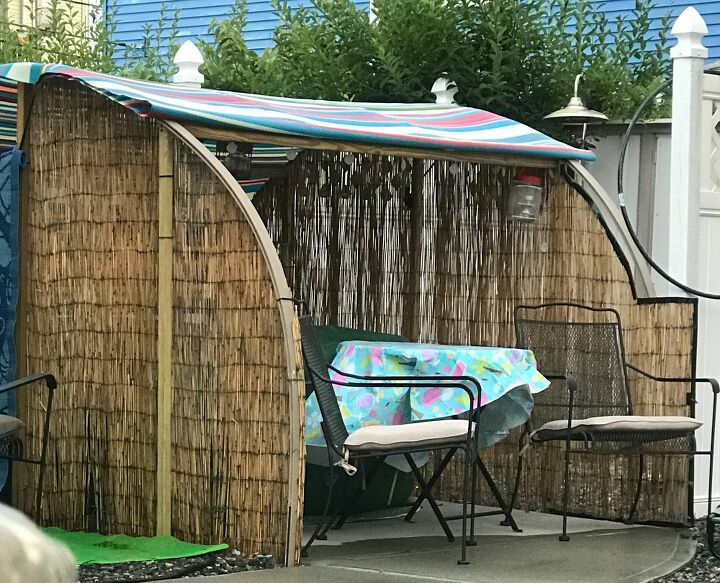
We cut our reed fence materiel to fit and secured it with rip-ties. Before we put the decorative cover on, we stapled garden netting over the frame top for added cover support. Since I didn’t want to spend a lot of money or time sewing a nicer canopy cover, we just bought a decorative ground cover for $29.00 and secured it to the top using screws and washers. The cover was longer than what we needed. Rather than cutting it to size, we left it long so we could have the option of folding the extra over the top or rolling it down for more privacy.
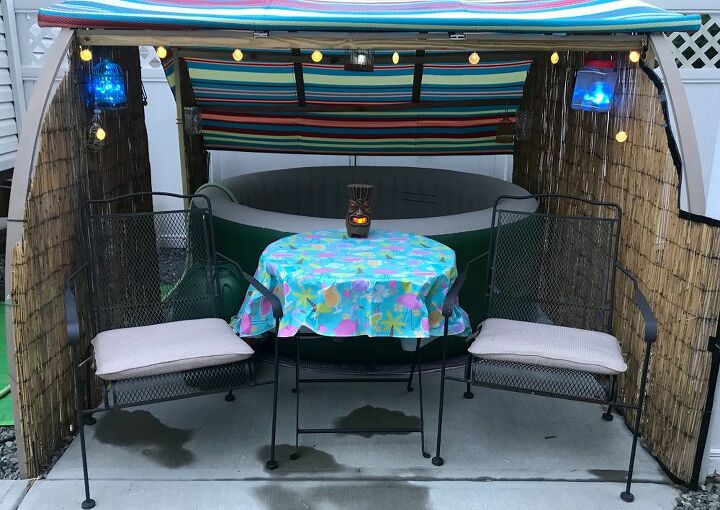
I added some string lights. I also set some tiki torches in pots of sand in the front to keep the mosquitoes away. The cover is great when it’s raining and really shades well the area gets full sun.
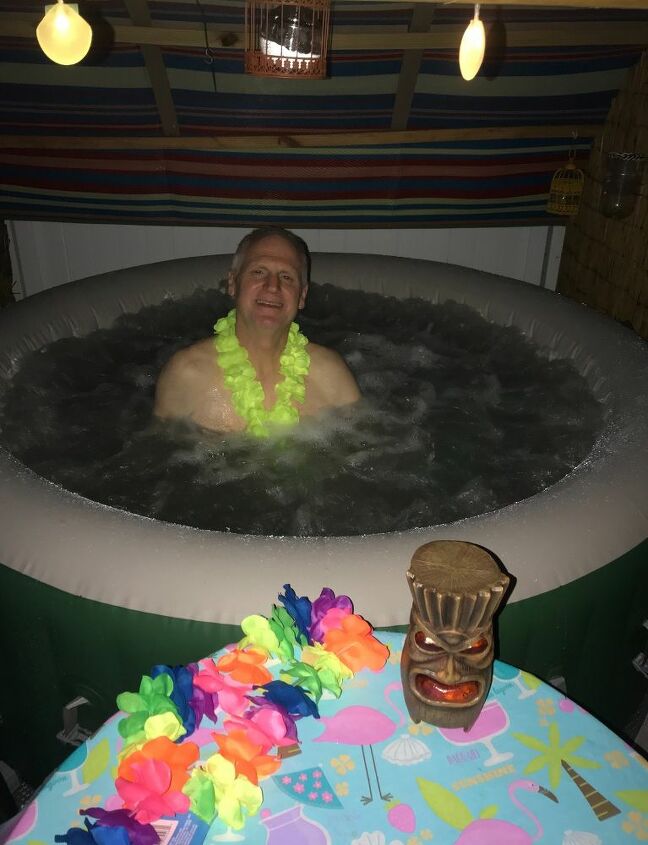
I think our little space turned out pretty cute considering we didn’t spend too much time or money to create it. Our cost to build and decorate our enclosure was only $100.00 since we already had most of the supplies. It would of cost quite a bit more if we needed to buy all the materials and decorations. I think I may want to sew a nicer canopy, but maybe later on since outdoor fabric is pretty pricey. By the way, we live in a very windy area and have had many things in our back yard ruined by strong winds and heavy snow, but our hot tub enclosure and cover held up beautifully this past winter even with all the heavy snow and winds.
Resources for this project:
See all materials


Comments
Join the conversation
-
How lovely enjoy
-
Lovely way to make the rest of the world go away.


Frequently asked questions
Have a question about this project?
Am unsure of the type of PVC strips that were used. Need something flexible and waterproof for outdoor "awning". Can you help??? Thank you!!!
Love it!!