


Repurposed Credenza Sideboard
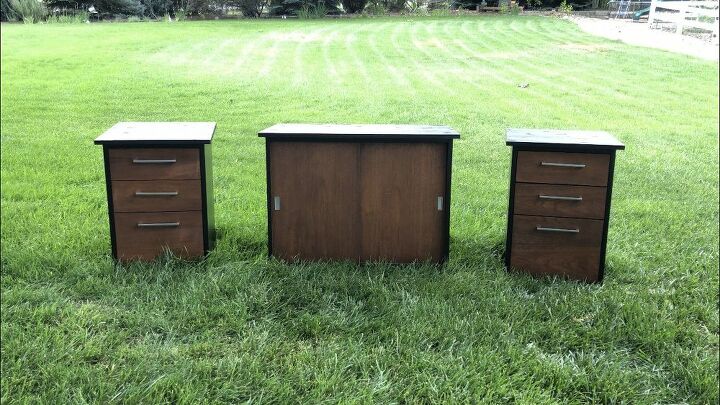
I found this free office credenza at the local community center. I was so excited because I knew that we could repurpose it into bedroom furniture!
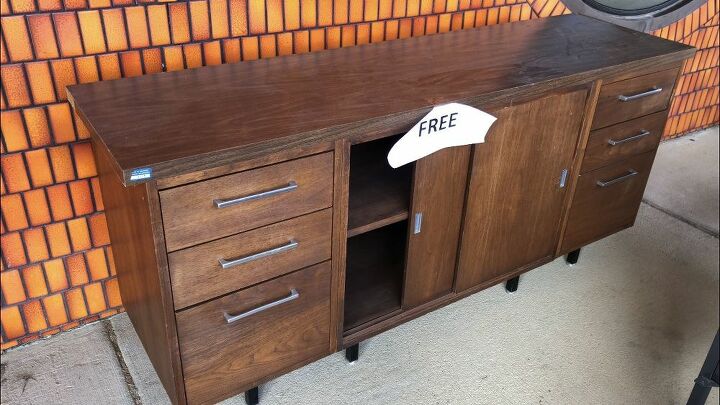
This is the original credenza sideboard sitting outside the local community center. I was super excited to find this piece.

We had to pull it apart to get it in our car, so we took the top laminate piece off to find that the 3 bottom pieces were all individual. We removed the legs as we wouldn't be needing those. We'll be using the counter top for another project at a later date.
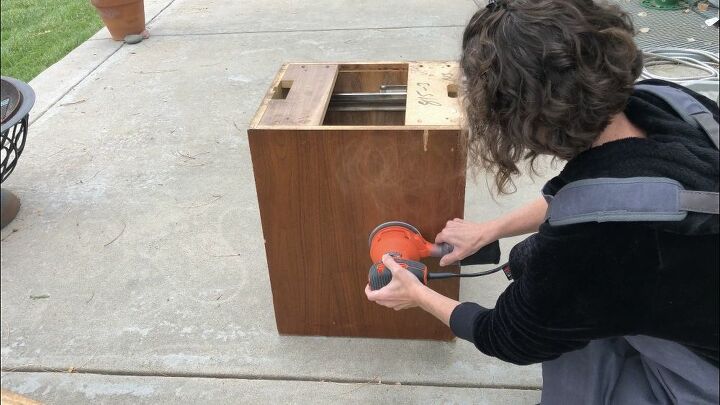
I pulled out the drawers and doors. I lightly sanded the pieces to get it ready for painting.
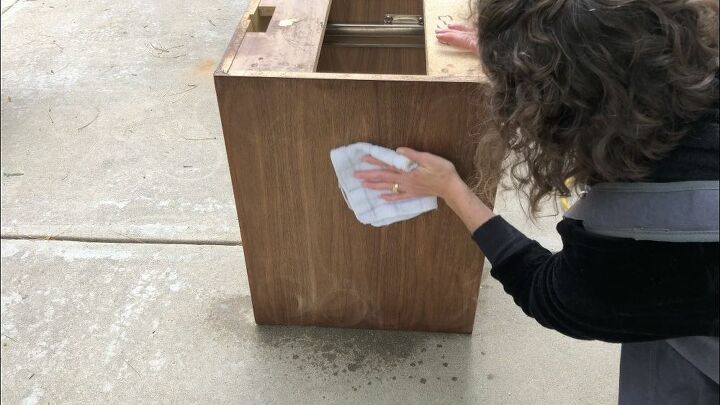
After sanding I cleaned the pieces with denatured alcohol.
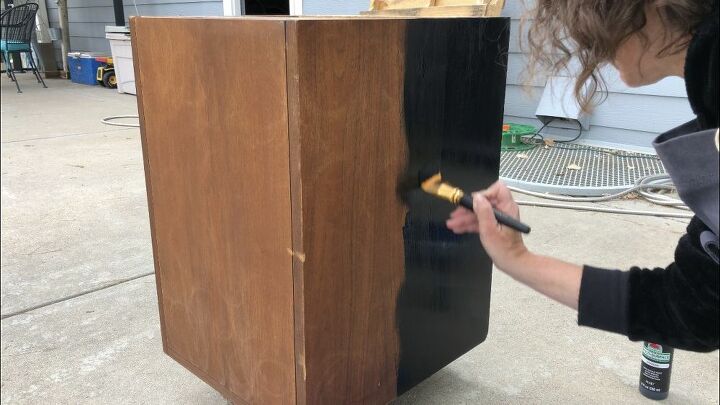
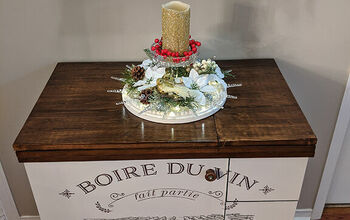
I painted each piece with Black Apple Barrel Multi Surface Satin Acrylic Paint. I painted 2 coats letting it dry between each coat.
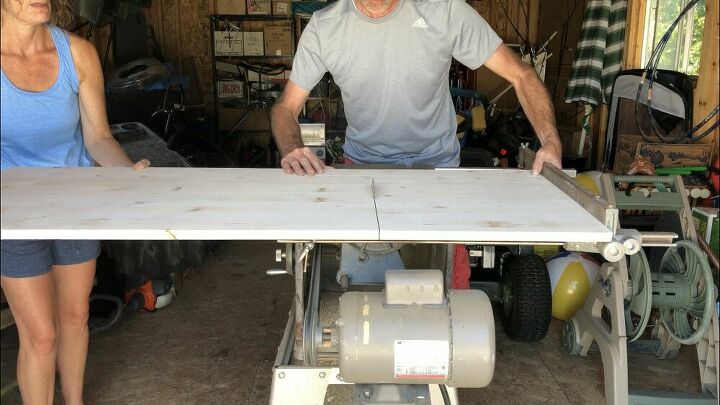
We measured the tops of all 3 pieces. We bought a Craft Master's Pine Laminated Project Panel and cut it into 3 parts for the tops.
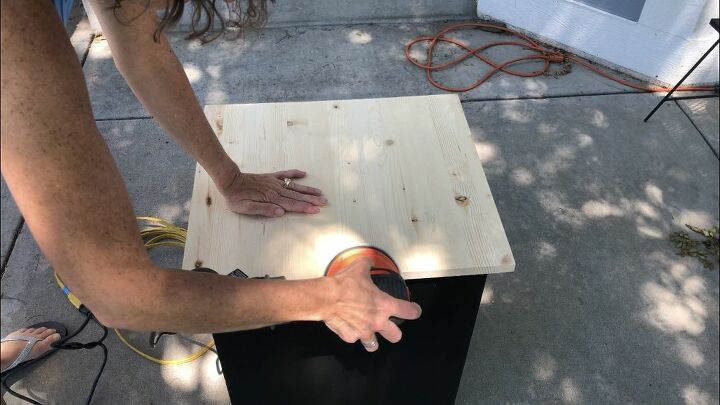
I sanded the tops and corners and wiped them off.
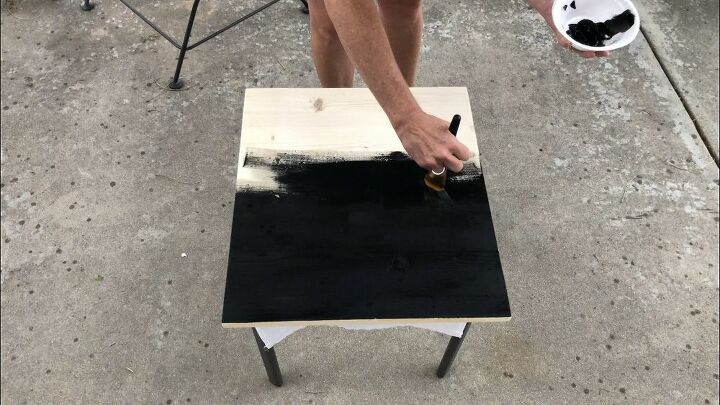
I paint the tops with more of the Black Apple Barrel Multi-Surface Satin Acrylic Paint. I painted on 2 coats and let it dry between each coat. I love the way it soaked into the wood and how you could still see the wood grain.
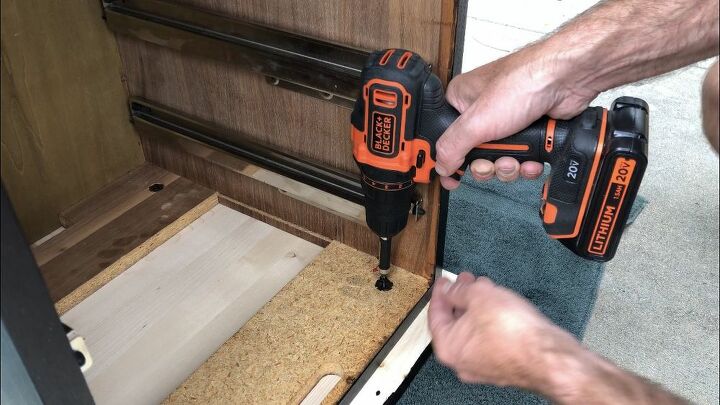
After it dried, we screwed the top onto the base of each piece.
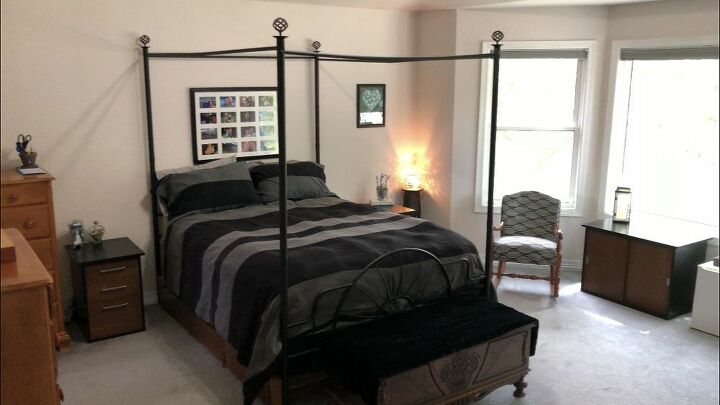
The set was finished and ready to go in our home.
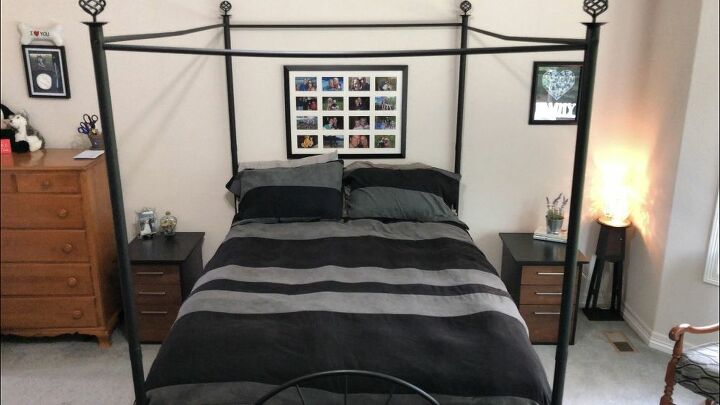
My husband had been wanting new night stands with some sort of drawers or doors and this fit in perfect.
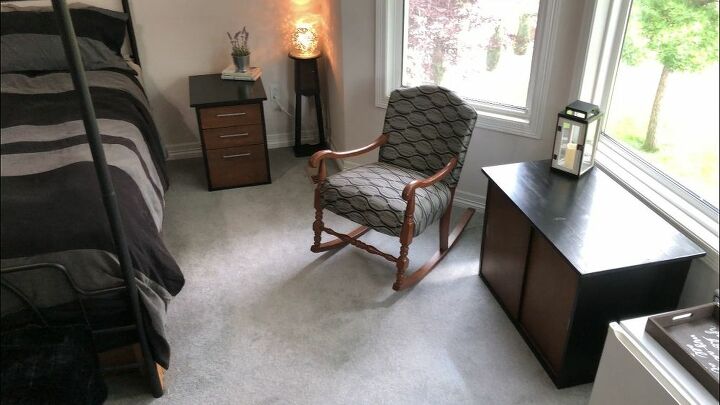
We put the other piece by our rocking chair as a side table and inside we store our extra bedding.
I would love to have you stop by my blog Chas' Crazy Creations for the full tutorial as well as sign up for my latest creations, posts, recipes, exclusives, and more...
I would love for you to subscribe to my YouTube channel to see more of my crazy creations - https://www.youtube.com/c/chascrazycreations
Resources for this project:
See all materials


Comments
Join the conversation
-
Fantastic! I love the repurposing posts. This turned out beautiful and so practical and Free!!!
-
Well done! I think the legs need to be added so your nightstands are closer to the same height as the bed matress.


Frequently asked questions
Have a question about this project?
Awesome job. Looks like custom made for your bedroom. Well, i guess it really is. How were you able to see this in that awkward piece of discarded furniture?
That's so clever and looks awesome!! The pieces work perfectly in your room! Nicely done. Just wondering where you found the pine panel for $2?! The last time I bought a pine panel it was only about half that size and was $30. I'd love to find a piece that large for only $2 for future projects!!
Amazing! One thing thats missing tho!......where's all the plants?😂😂