


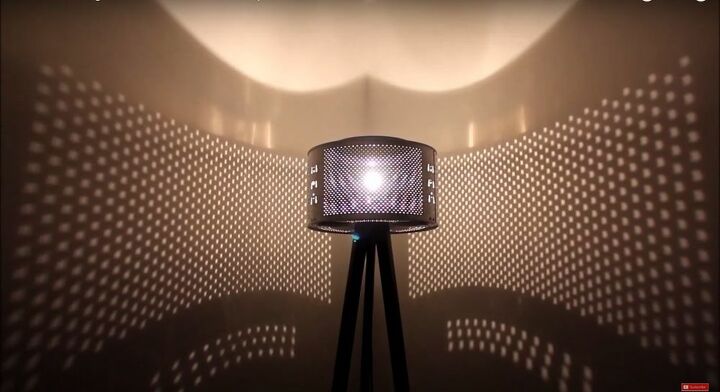
Upcycle an Old Washing Machine Into a Mid-Century Modern Floor Lamp

I love finding new uses for material that most people would throw away, and this project is no exception. I took an old, broken washing machin e and repurposed the drum into a stylish floor lamp. This project is quick, easy, and earth-friendly! The matte black of the legs contrasts beautifully with the shiny silver of the washing machine drum, and the holes in the drum create interesting patterns when you turn on the light. What’s not to like? Check out my 10-step guide to build one yourself!
Tools and Materials
- Old washing machine
- Flathead screwdriver
- 3 pieces of wood
- Tape measure
- Pencil
- Circular saw
- Electric sander
- Square piece of wood
- Electric drill
- Electric screwdriver
- Wood glue
- Screws
- Wood plugs
- Black satin paint
- Paintbrush
- Limescale remover
- Polish
- Cloth
- Lamp wiring
- Lightbulb
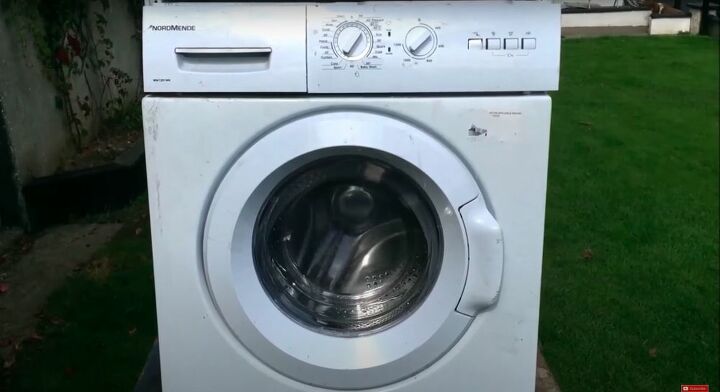
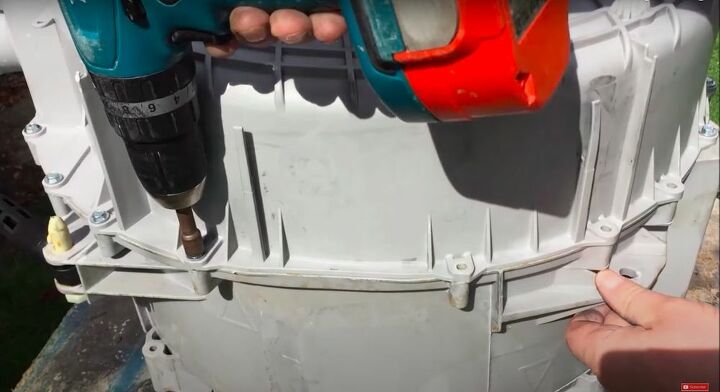
Take Apart the Washing Machine
The part that we’re after is the drum, so I needed to take apart the entire washing machine to get to this one piece. Use whatever tools necessary, though I found that a flathead screwdriver basically did the job. Once you get to the drum handle it with care, making sure not to scratch it.

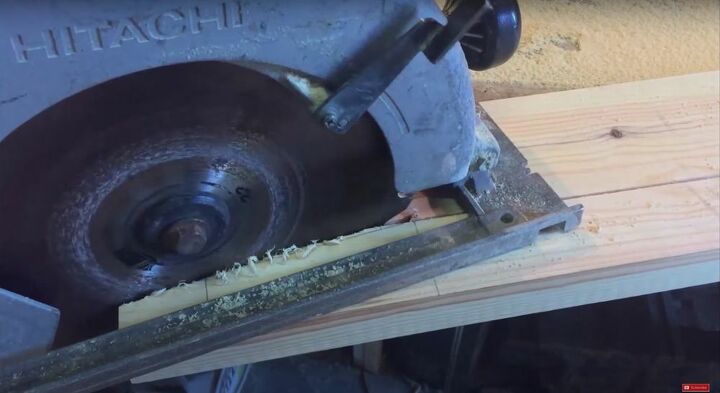
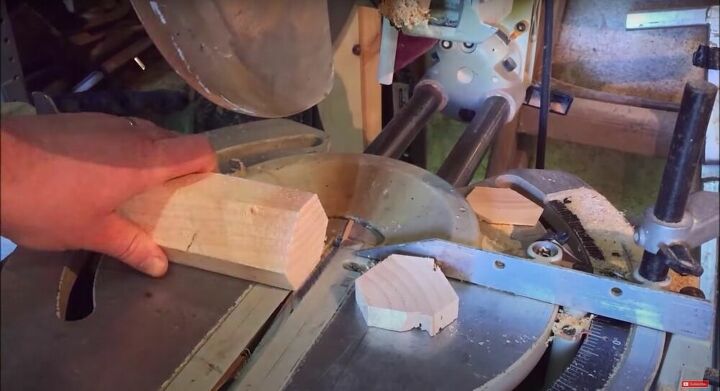
Cut the Wood for the Legs
I was inspired by the mid-century modern style when it came to the legs of the lamp. I loved the look of a tripod, and set out to create one myself. I planned on adding a piece in between the three legs of the tripod at the top, but I still needed to make sure that they sat together comfortably against this center piece. I measured an angle that would allow this to happen and cut all three pieces at the same angle with a circular saw.
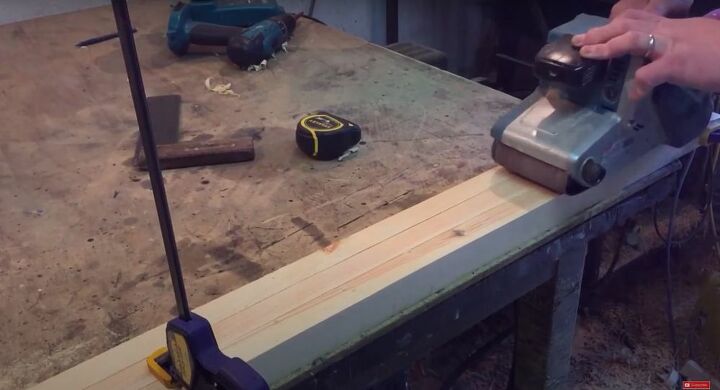
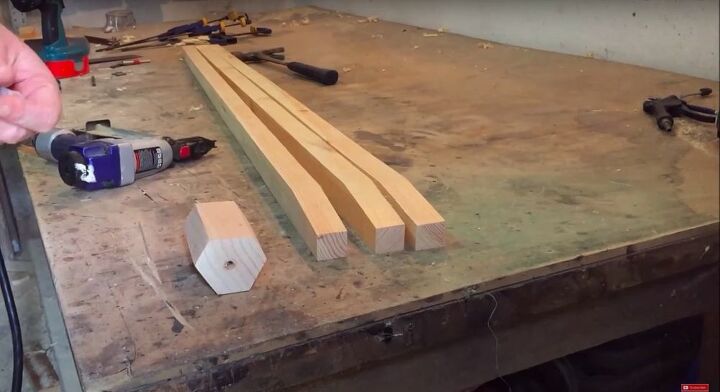
Sand the Legs
Holding the three legs together, I ran over them a few times with an electric sander. This made sure that all of them remained the same size and would fit together snugly.
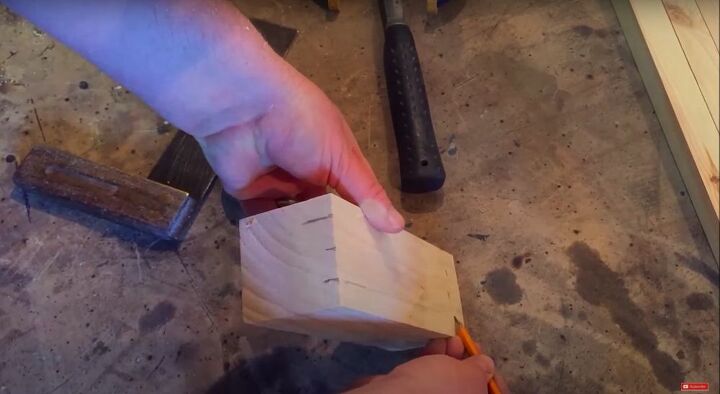
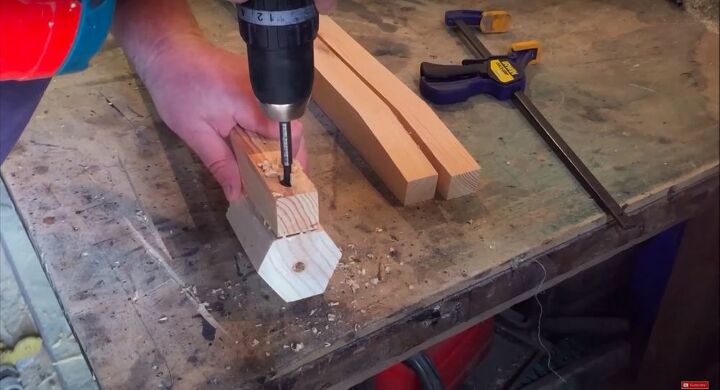
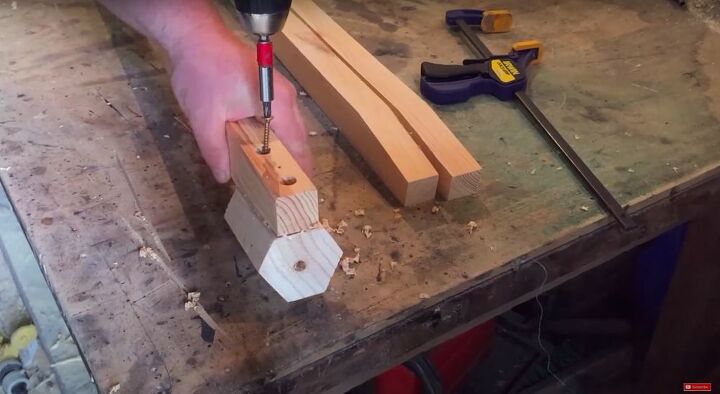
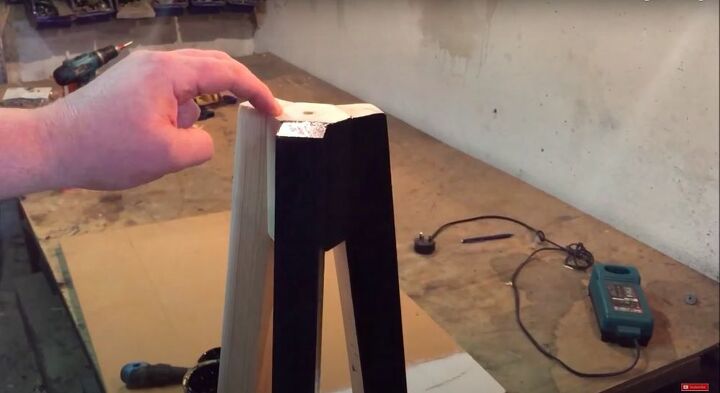
Create a Center Piece to Join the Legs
For the piece holding the legs together I started with a square piece of wood. At a 30 degree angle, I cut off the sides of the square, leaving me with three large and three small flat sides. I would eventually attach the legs to the larger flat sides.
Once I had the piece cut to the size I wanted, I drilled a ⅜” hole down the middle to provide a way for the electric cable to enter the steel drum.

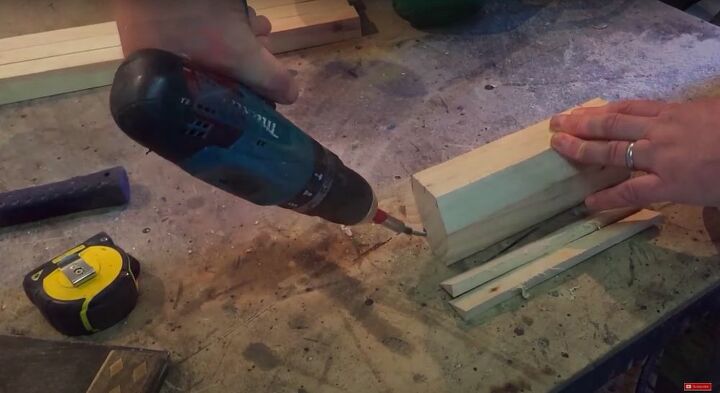
Attach the Legs to the Center Piece
To attach the legs to the center piece I first glued the angled end to the piece.
Then I drilled two pilot holes and screwed it onto the center piece. When doing this make sure that the screws aren’t so long as to block the hole in the center piece created for the cable. Repeat this process with each leg.
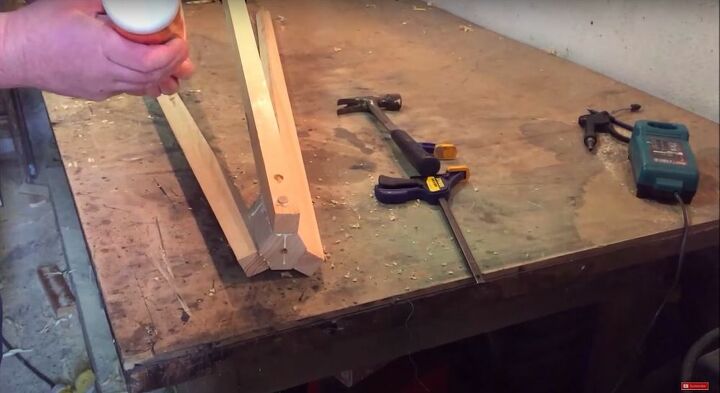
Once completed, I inserted wood plugs to cover the screws and sanded them until flush with the rest of the leg.
Paint the Legs
Using black paint with a satin finish I painted the entire tripod. I chose a satin finish because I thought it would contrast nicely with the shiny metal drum.

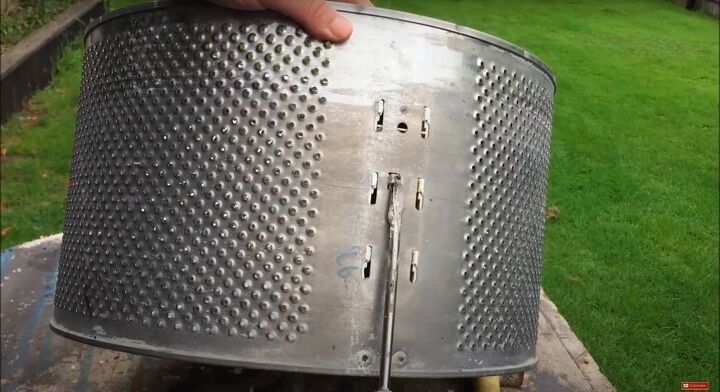
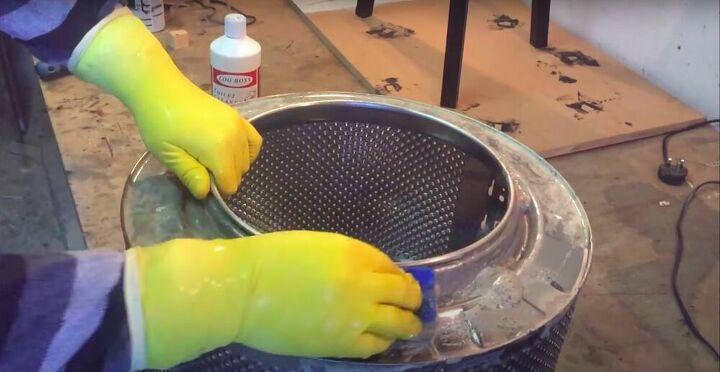
Clean the Drum
Where I live we have hard water, so before attaching it to the tripod, I had to clean the washing machine drum. Using limescale remover and lots of elbow grease, I scrubbed the entire drum. Don’t use anything rough, like steel wool, as it will scratch the drum. Additionally, please be careful while doing this, as limescale remover can be quite caustic and dangerous if handled improperly.
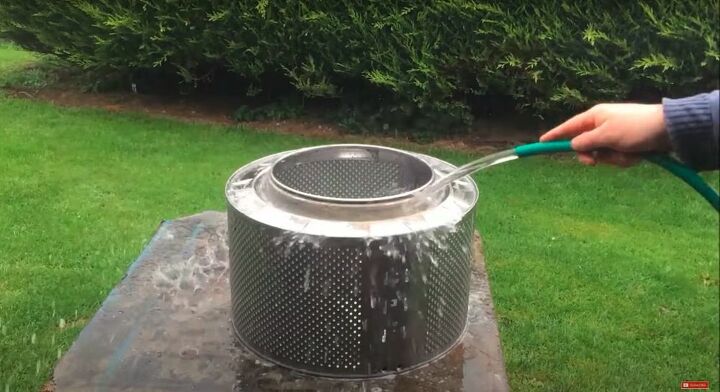
Then I rinsed the drum off and moved on to shining it.
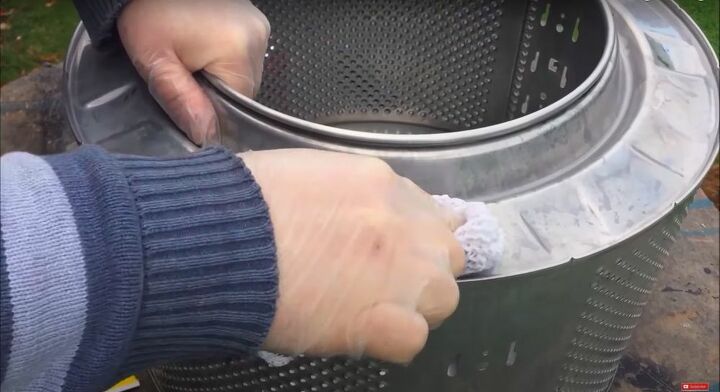
Using a paste compound and a rag I scrubbed the entire drum until I was happy with its shine.
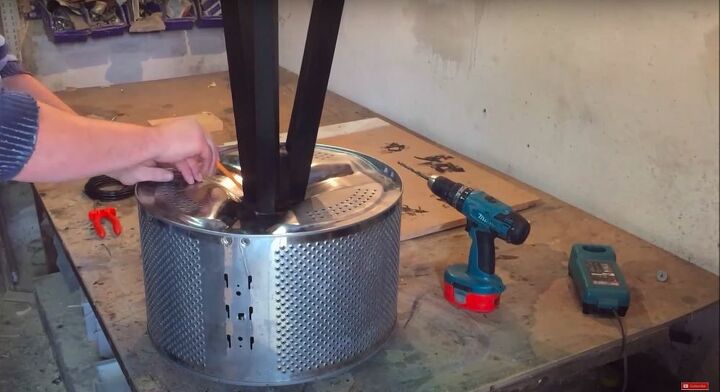
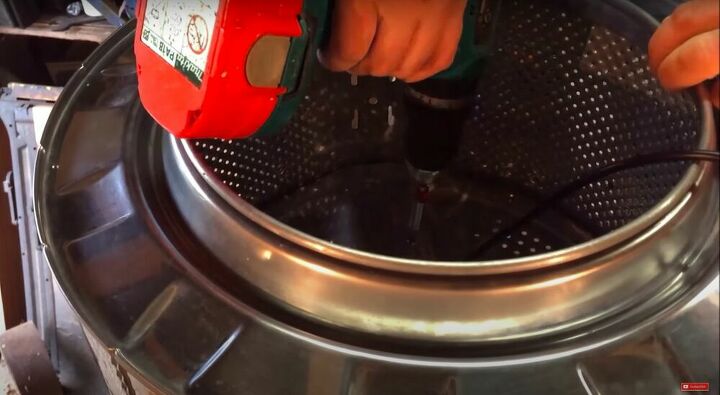
Drill Holes in the Drum for Screws
With the drum ready to be attached, I first had to mark where I needed to make holes for the legs and the wiring for the lamp. I lay the tripod I had made upside down on the bottom of the drum and marked where I wanted to attach it.
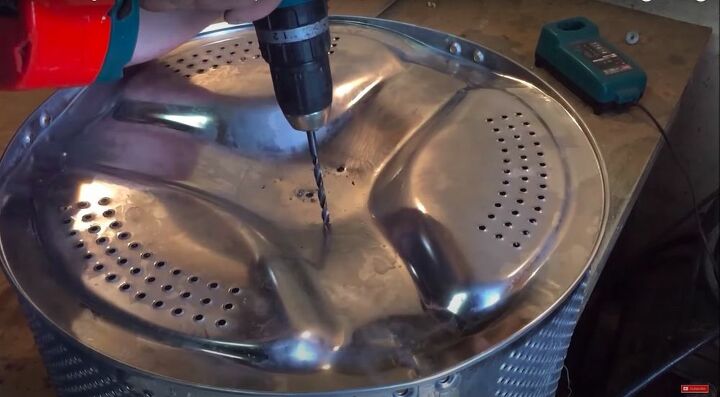
Then I drilled four holes, three for the tripod and one in the middle for the wiring.
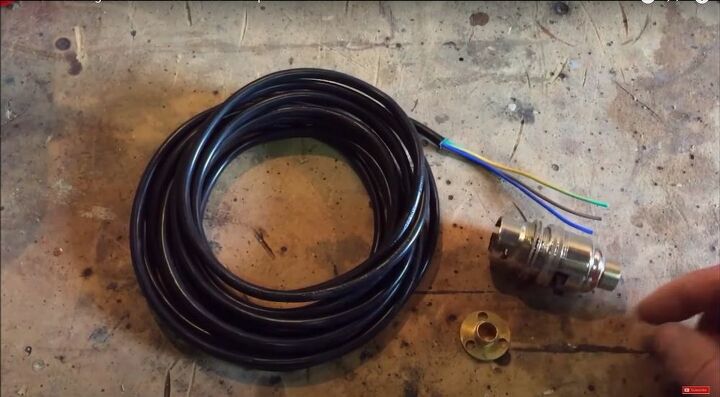
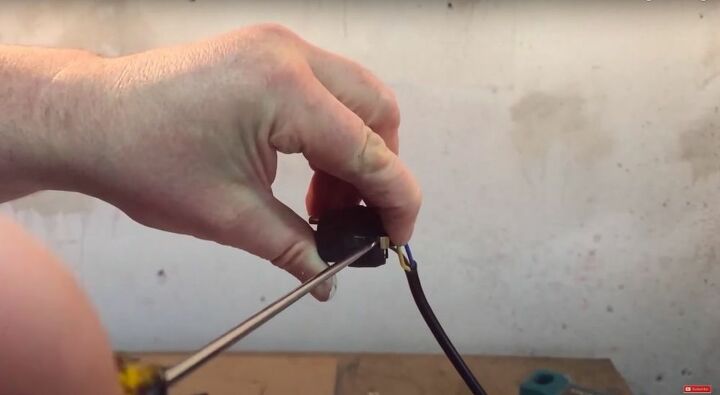
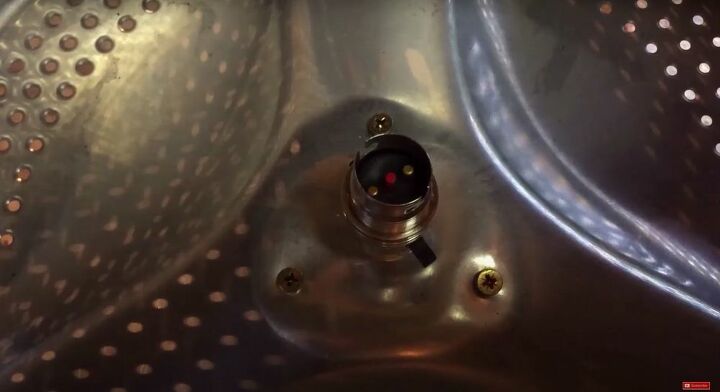
Wire the Lamp
Now it was time to wire the lamp! I thread a 3 core electric cable through the top of the tripod and the hole in the drum and then attached the lamp bulb holder inside the drum using a brass fitting to hold it in place. Make sure to properly wire the live, neutral, and ground wires when wiring the lamp yourself.
Screw the Drum to the Tripod
One last step before I could put my new lamp into use was to attach the washing machine drum to the tripod I had built. It was quick and easy using only three screws. Then I screwed in a lightbulb and I was ready to go!
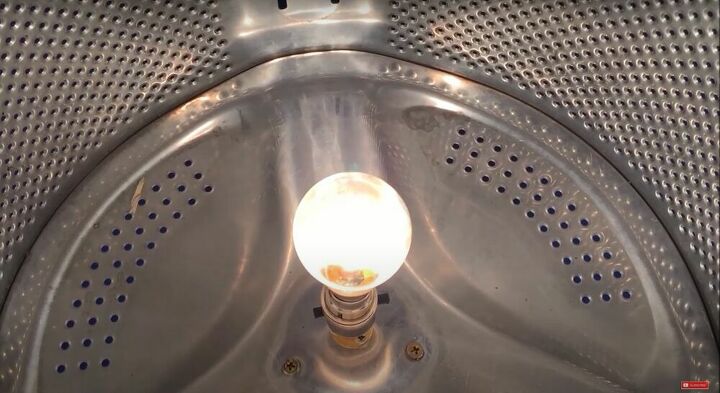


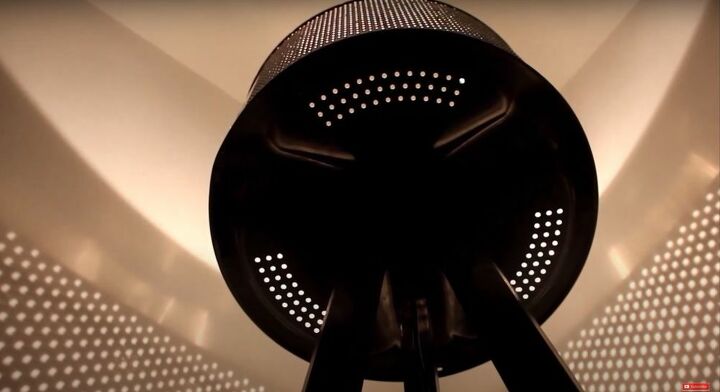
That’s it! It only took me ten steps to take an old broken washing machine and turn it into something new and useful. I love the interesting shadows that the holes in the drum throw when the light is on. It’s an interesting piece that is always a conversation starter with my guests. How have you upcycled old, broken items? Let me know in the comments below.
Resources for this project:
See all materials


Comments
Join the conversation
-
Well, look at you all clever and S@%T!!! Nice job!!!
-
You deserve a scale from 1 to 10. 10 being the best! Yours is 100 times over the BEST!!! Very AMAZING!!!


Frequently asked questions
Have a question about this project?
Did you put someting over the top of the lamp.?
Did you install the Lamp switch outside /or inside ? it's possible to put switch outside......ease of operation
I love the look of it but wonder if it could be hung from the ceiling? Chains perhaps?
Thanks for sharing.